Showing posts with label milk-free. Show all posts

Friday, September 16, 2011

Onion-Rye Dinner Rolls

I'd been saving the recipe for onion-rye dinner rolls from the package of Hodgson Mill rye flour for a long time. I ran into it the other day, and decided it would be great for soup.  Yesterday was a rainy day, so I whipped up a batch.  Easy to do in my mixer (which I didn't own before I joined this baking group!).

Some substitutions were made, as I wanted it to be vegan:
Water used instead of milk
Margarine instead of butter

Here's a picture of the dough, right after it's mixed.


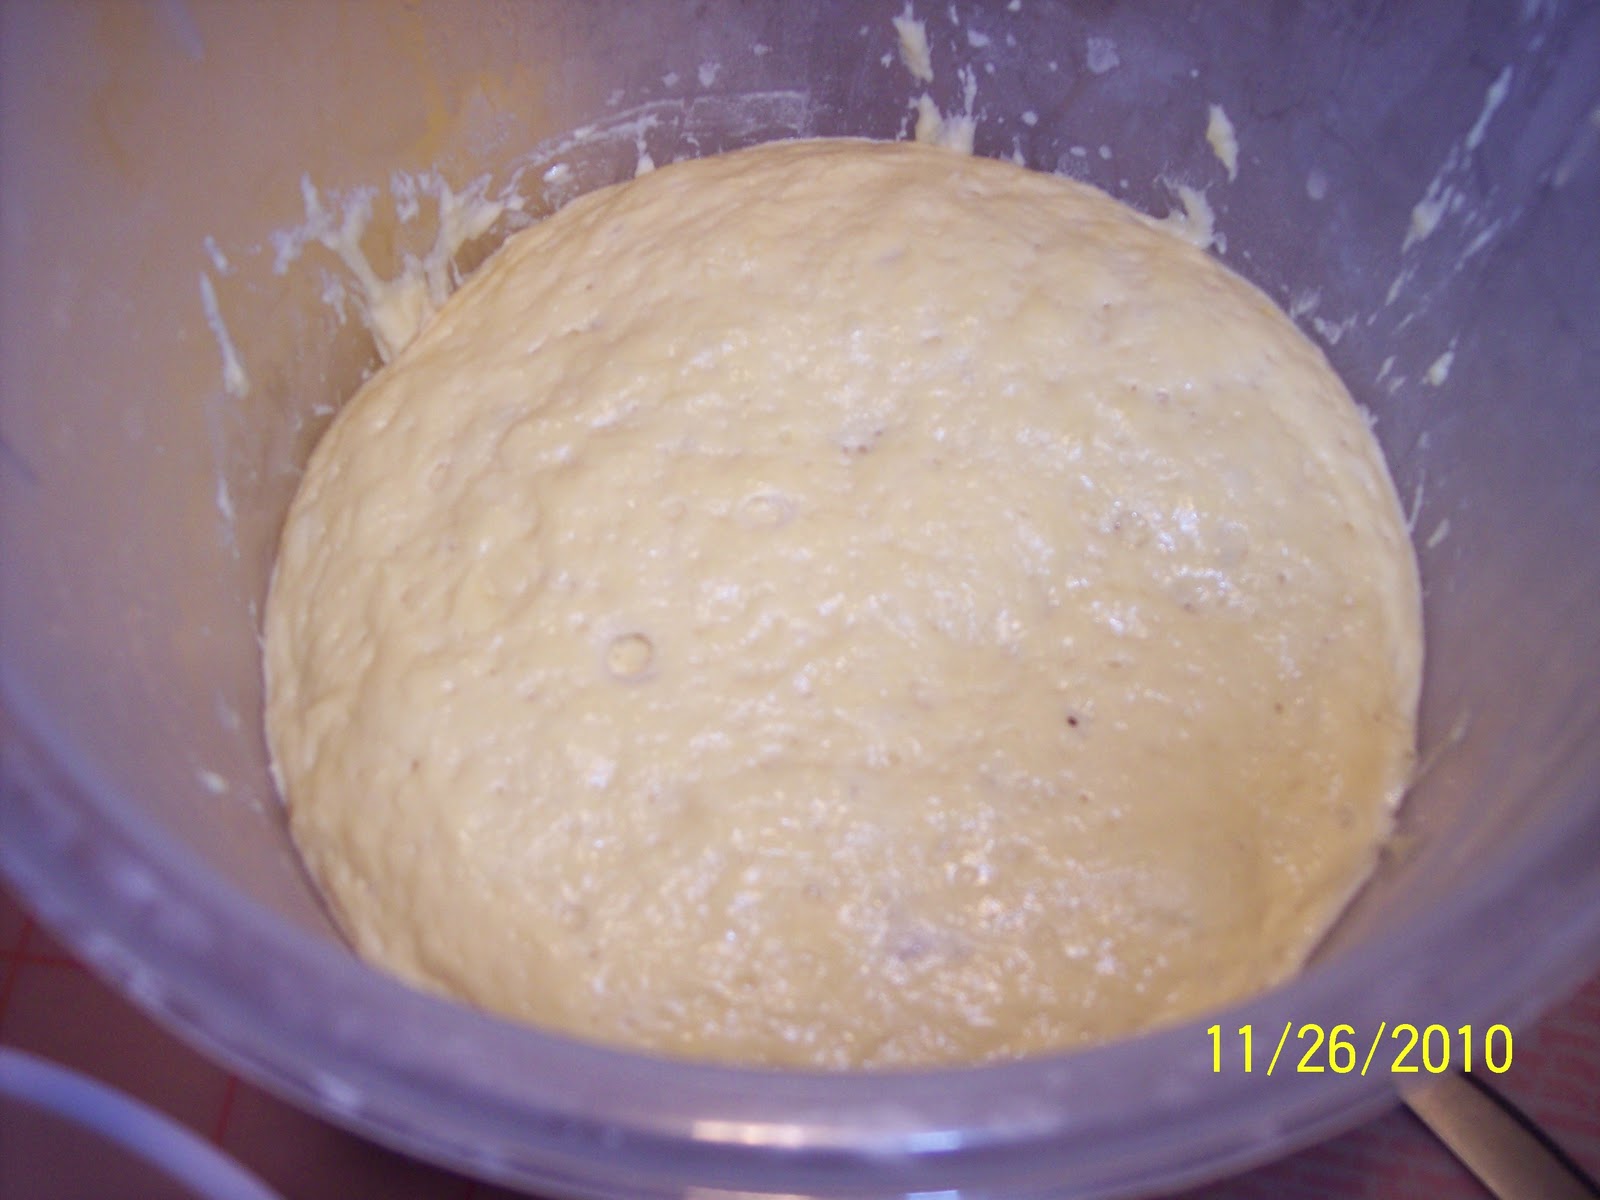
And after it rose (ok, I was out of the house awhile, and it rose longer)


Here's how the rolls look after I shaped them. They are formed by shaping the dough into a long log and cutting pieces off.  I added the step of rolling them a bit.


The rolls, cooling.  Egg wash was brushed on them before baking. They were baked on convection setting, so both sheets could be done at the same time.


These rolls were wonderful with soup last night!

Finally, I just can't end this post without sharing pix of one of the cute dogs at our local farmer's market.  They really brighten my day!  My computer's down so I hope to post more later:

This yorkie, Jazzie, will steal your heart!  She loves riding around in the basket of her owner's motorized scooter.  A vendor made her a collar with some bling!

Thanks for stopping by.  I look forward to your comments and seeing what you have been baking.

Thursday, August 25, 2011

Toasted Millet and Fruit Bread


I made a couple of slight changes to this recipe.  White whole wheat was used.  The optional nuts weren't added to the dough; they were rolled into the dough.

I used the letterfold technique, and it gave me nice long loaves.  I made a half batch of the recipe, enough for 2 pounds of dough.  In the center of one, I put almonds.  Walnuts were put in the center of the other loaf, which was going to be a thank you gift for a friend.


I put the corresponding nut on top of each loaf, so I could tell them apart:


My baking stone was used.  It's been in my warming tray for storage too long!  I baked it a bit differently, though, to save my tempermental oven.  The bread steams and forms a crust the first half of baking only.  Therefore, the loaves were baked at the higher temperature.  Halfway through, I changed to 325 degrees convection.  The convection baking moved the hot air around, while giving my oven a break.  The results were wonderful!:

I decided, however, to freeze our loaf for a week.  It was great after being frozen and reheated.  The loaf had a nice texture, but it wasn't crunchy from the millet.  Maybe the freezing softened the millet.  It was a really good bread.  By the time I realized that I hadn't taken a picture of the loaf's inside, this is all that was left:


Our friend loved her bread!  She said she ate half the loaf the first day, it was so wonderful.  She emailed my hubby that "your wife is awesome!"  Wow, what a wonderful complement!

Thanks for stopping by.  I hope you will leave a comment.  I look forward to what you will bake!
Judy

Wednesday, July 13, 2011

Multigrain Bread Extraordinaire

For this baking project, I decided to try Peter Rheinhart's "Multigrain Bread Extraordinaire."  The HB5 bread assignments this time just didn't interest me.

Peter, in his book, "The Bread Baker's Apprentice," said that people really liked this bread.  Since I'd like to add a multigrain sandwich bread to my Farmer's Market menu, I thought I'd try this one.


The dough starts with a "soaker."  I don't know the difference between a soaker and a starter; they are probably the same thing.  This soaker is a combination of coarse cornmeal, wheat bran, rolled oats, and water.  It's a good opportunity to use the freshly-ground cornmeal from the farmer's market the other day.  The bowl is covered with plastic wrap, and left on the counter overnight so the enzymes can start working.

One recipe change was to use only water, instead of the suggested water and milk.  Peter's recipe notes said that makes the loaf chewier, and no crust carmelization.  The finished loaf was definitely chewy!

I didn't have a 9" x 5" loaf pan, so I used two 8.5" x 4.5" pans.  I let them rise a bit longer, so that the loaves would bake taller.

Here are the finished loaves.  They were baked for 20 minutes, and then the loaves were rotated 180 degrees.  Then, they were baked an additional 20 minutes.  They turned out golden brown!

I was hoping that the loaves would come out taller.  I guess that's why a single two pound loaf was suggested in the recipe.

We really enjoyed this bread.  Very tasty.  Even though it's called a multigrain bread, however, it seemed to contain mostly bread flour.  I might experiment with the recipe--to remove some of the white flour and add additional whole grain flours.

Thanks for stopping by and visiting!  I look forward to hearing your comments and seeing your breads.

Judy

Tuesday, February 1, 2011

Brioche--Is Butter Really Better than Margarine?

I'm catching up on some of my posts, and thought I'd share this one with you.  Around Thanksgiving, I went into test kitchen mode.  Zoe Francois, one of the AB5 and HB5 authors, posted a step by step instruction for making Zoe Francois' AB in 5 Soft Thanksgiving Dinner Rolls

Zoe's recipe calls for butter.  She's a wonderful, talented pastry chef, and I wondered if she cringed when I asked about using margarine in brioche. (Her later post said that she didn't.).

However, we have dietary restrictions.  Therefore, we usually use margarine instead of butter or water/soy milk instead of "regular" milk.  However, I began to wonder if there really was a taste difference....   I decided to make a half batch of AB5 brioche dough with margarine, and a second batch with butter and compare.  Just this once.  

Brioche dough, using margarine
I began by making a half batch of brioche dough with margarine, a week earlier.  I made a change by adding a bit more flour to the dough, so I could make a braided bread.  After refrigerating the dough overnight, the dough looked like this.  It made a really nice braid:


Braided loaf from brioche dough


The bread was good, but not fabulous.  Due to all the eggs and the extra flour, the bread had a very firm feel and mouthfeel to it.

Last night, I made another half batch of brioche dough.  This time, I followed the recipe exactly.  I used butter. The dough looked a bit different from the one made with margarine--different color:

Brioche dough made with butter
Brioche dough, using margarine
 It's a bit looser looking because I didn't add the extra flour.
  
Brioche dough, after gluten cloak
Zoe's instructions didn't say anything about doing the gluten cloak, but all Jeff and Zoe's recipes call for it.  I did the gluten cloak with the 1 1/2 of dough I was going to be using.  I did the same with the 2 ounce pieces of dough for the rolls.  Maybe it's overkill, but I was looking forward to some special rolls!


I placed the pieces of dough in the prepared pan and covered them with a tea towel:


I know the recipe says to use plastic wrap, but I love tea/flour sack towels.  They work well, and are more environmental in my opinion.

While the rolls were rising, I used the rest of this butter-dough to make a loaf of brioche bread.  Since this dough wouldn't have butter added on top, it would be a better comparison for my loaf made with margarine.    
Brioche loaf, with butter
I covered this loaf with a tea towel and let it rise about 1 1/2 hours--till the rolls were out of the oven.


After about an hour, I put the egg wash on the rolls and placed them into the 350 degree oven.  I usually put the timer on for 10- 15 minutes less than the rise time, so I turn on the oven at about the right time.


The rolls looked heavenly after about 30 minutes in the oven.  My mini egg poacher seemed perfect for melting the butter!


It was going to be tough to wait to taste them!


I put the loaf into the oven.  When it was done, it looked just beautiful:
Buttery Brioche Loaf


And the taste?  I broke open the first roll and ate from the inside.  The rolls, made with butter, had a slight more "buttery" taste.  


I brought a roll out to my hubby, who was wrestling with our leaf blower's vacuum attachment.  He gave the rolls a "9," which means he felt they were really good.  He couldn't tell the difference between the dough of the margarine and the one from the butter. 


The next step would have been to taste them both at the same sitting, but we were too full!  Both were really good.  However, some butter purists may enjoy the batch made with butter.


Stay tuned...

Monday, September 20, 2010

100% Whole Grain Maple Oatmeal Bread


Maple Oatmeal Bread, mini loaf

There wasn't much time to make this dough, but much time wasn't needed!  That's the beauty of this type of baking.  The most time was spent buying the wheat germ for this recipe and quinoa for the next loaf.

Raisins were added, after hearing reviews of this bread from other group members.  As usual, I rinse my dried fruits to clean them.  This also keeps the fruit from soaking up liquid from the dough.

Dough, next day

The dough was rather wet, but I didn't mind.  I knew that I would be making mini loaves.  


The next day, the dough was stiffer.  It is possible that the raw oatmeal had absorbed some of the liquid.  Still, it wasn't easy to do the gluten cloak.  

We had a lot of plans for the day--building our harvest booth.  So I quickly covered the pans to let them rise, set two timers (one to turn on the oven awhile before actual baking), and went outside to start work on the booth.

I had made half a recipe, and it was just enough for 3 mini loaves.
Ready to rise in mini pans

When the second timer went off, the loaves were put into the oven.  Because they were mini loaves, they would bake sooner.  I kept setting timers for 10 minute intervals, and took them out when the internal temperature said 195 degrees.
Yummy, full of raisins and flavor!
The breads were a really nice snack for all of us building the harvest booth!  Nice crumb and flavor.  My friend, Debbie, said that the raisins really made the loaf!  Even my hubby said that he really liked it.  We all felt the loaf would be great with butter.  Next time, I might add some walnuts.  

I think I'll have another piece right now--excuse me for a minute...

Mmmmm, tastes great with honey butter!

What a great treat to have while we built the booth, and to give a loaf to my friend.  Here's some pictures of our harvest booth: 


Putting up the "walls"


Our crew, the booth all finished.  The "roof" is bamboo mats, so you can see the stars at night.  Peyton, who is 9, is a pro at putting up the lights.  We will be adding Chinese decorations later on, for our Asian theme.


The booth, lit up for night.  We need to add more decorations, a table, chairs, and lots of happy people!  Our friends look forward to this celebration every year!


Handwise tips:  If you have hand pain, tendonitis, or arthritis or any other pain issues and want to make this recipe:  
I guess the best tip for this recipe is to add the dried fruits into the water/dough, when you are making the dough. And rinse the raisins--you will be surprised how dirty raisins can be.

This bread is one of the breads from the "Healthy Breads in 5 Minutes a Day" book.
The HBinFive Baking Group, started by Michelle of Big Black Dogs, is baking through all of the breads in this book.  To see what my HB5 baking buddies have made recently, check out welcome-to-the-19th-hbinfive-bread-braid/">The 19th HBin5 Bread Braid
 
Thanks for stopping by to visit!  Come back soon, I'll be baking again often.  I hope you will leave a comment below.  I read every comment, and really appreciate your feedback.


Judy

Sunday, June 27, 2010

Adventures with Brioche!

Adventures with Brioche!


Just had another baking adventure!  I now know the smoke detectors that are connected to the alarm company work!!! Check the notation I put in my cookbook--"Put foil or a pan underneath so that the caramel won't drip and smoke!!!"

I have wanted to try making brioche. It seems to be a richer version of sweet challah, which I love.

The dry flour and salt were mixed up about a week ago, when I measured out the ingredients for the banana bread:


 Shlep once, bake twice!


A few days ago, I mixed up the dough.  It looked beautiful when  the dough came out of the refrigerator this morning:   

First, I prepared the brioche loaf.  I decided to experiment with the loaf shape, by forming 6 balls and shaping them in the pan. The pan looked bare at the beginning, but I put it to rise anyways.  It really rose after a few hours.

While the loaf was rising, I prepared the Caramel Sticky Buns, according to the directions in  the book.  I put the caramel topping in the round cake pan and weighed out the dough.  I formed the dough into a ball...

and let it rest for a few minutes to make it easier to handle.  I rolled the dough into a rectangle with my pastry roller and added the filling.  Love that gadget--I can hold the pastry roller by the vertical handle in the middle and have better control!) I rolled the dough into a long log.  I used my bench knife to "unstick" any part of the dough.

 Finally, I used a very sharp serrated knife to cut the dough into 8 pieces.  The buns were placed on top of the caramel topping in the pan.  I let them rise really high.  Boy, would my hubby love these!
 

I had never baked caramel sticky buns before.  I figured it would take awhile to bake, so I put them in the oven while I went out of the kitchen for about 10 minutes.


When I came back, I turned the oven light on to check the buns.  There was a flame on the heating element!  I opened the door and smoke was billowing out!!!  The caramel must have been dripping out of the pan.  I turned the oven off and put a pan underneath.  Forgot to turn the oven on again for about 10 minutes.  After finally remembering, I turned the oven back on to finish baking.  A few minutes later, smoke began billowing out ( I was in the kitchen but washing dishes and looking the other way) and the smoke detector went off.  I guess the caramel on the pan was smoking. 


I couldn't find the alarm company phone number (it was posted, but hidden by a box of Kleenex). Several frantic minutes may have passed, trying to find the right number.


Finally found the alarm company number on my cell and called them.  I told them "it was a cooking incident, and don't tell my husband.  And, by the way, how do I turn this darn alarm OFF?"  Turned the alarm off.   Called them back a few minutes later to ask why they didn't call me.  He said that my line was busy. Besides, they call the fire department first!

Oops, I almost forgot the brioche loaf!  I took it out of the microwave, where it had been rising for a few hours.  I was afraid that it rose too much:


I brushed it with egg wash and put the pan in the oven.  I went to laugh about the buns incident with another baker.  After about 30 minutes, the loaf was done.  What a beautiful golden color!


Well, I ended up calling my hubby; I can't keep anything from him!  The oven works; this is a new oven element that I replaced only in March-- 


and the house is fine.  Luckily, the only reminder is a pan that is burned from the small fire below it:


Between this and that pan of oven-ready dough I dropped earlier in the week, it's been quite a week of baking!


Well, thanks for stopping by to visit!  I hope you will leave a comment (or a laugh!) below.  Maybe you can add a handwise or time saving suggestion that will help others?


Handwise tips:  If you have hand pain, tendonitis, or arthritis or any other pain issues and want to make these recipes,


  • Make the dough several days before you bake. This brioche dough can be stored in the refrigerator for up to five days. 


    • Shlep once, bake twice!  Our group tends to make a recipe a week, and posts about them every two weeks.  I don't like pulling out my five-pound containers of flour. Filling up a smaller container more often is bothersome.  Some time and energy is saved by measuring out the dry ingredients for both recipes at once.    
    • Weigh out the ingredients by scale.  It's faster and easier than measuring by cups.  It's more accurate, too--a cup is a cup, no matter whether you fluff the flour or pack it in. Just be sure to label what's in your container!
    • A mixer or food processor can help you.  Put soapy water in it and maybe run it for a few seconds to help clean it after removing the dough.  
    • Then, if you are using a food processor, remove the dough hook/blade so that you can fill up the bowl even more.  Put an empty (cleaned)  container from 35mm film upside down, over the center portion and you can fill it up higher to soak. The water shouldn't leak out!
    • Let the dough rest if it resists stretching out.  Wait 10-15 minutes after doing the gluten cloak, and it can easily be shaped.  Good time to have a seat and rest your hands!
    • Bake on 2 separate days.  You don't have to bake it all at once.
    • Soak your tools in your empty dough bucket or a pan when you are finished using them.  That way, you can wash them easily later (or tomorrow!)  Give yourself the permission of time to clean up much later.

    About the HBinFive Baking Group
    The HBinFive Baking Group, started by Michelle of Big Black Dogs, is baking through all of the breads in the Healthy Bread in Five Minutes .

    Friday, March 26, 2010

    Milk-Free Ice Cream


    Like many people, I have collected tons of recipes over the years. Most of them are filed in notebooks, under their categories. Most of them are ignored, sadly. The notebooks are taking up too much room, along with my cookbooks! My hubby wanted me to throw them out. However, I told my hubby that I would give myself a year to go through as many recipes as possible to cull out what I wanted to save. That year is coming up quickly, at the end of May!

    Today, I wanted a non milk recipe for a satisfying cold dessert. I'll be having dinner with a bunch of people, and wanted something different and special. I ran across this recipe for "Non Dairy Ice Cream." I don't even know where I got the recipe, I wrote it down years ago!
    >
    Here’s the recipe:;
    --20oz. of frozen strawberries. You can take fresh, hull them, and partially freeze them if you want. They need to be partially defrosted anyways.
    --1 cup sugar
    --2 Egg whites 
    --2 bananas

    Partially thaw strawberries. Combine all ingredients in a large mixing bowl. I mashed it up with a masher, that's my addition to the recipe. Then beat on high until frothy. Freeze overnight to set. Here's a picture of the frozen dessert; I did it in 2 batches, to avoid splashing:


    The key is that you need to have freezer space for the large bowl (or two). We had this the other day when I made a "test run." It was delicious, tasted like frothy strawberry dessert. My hubby gave it a "9", only because it didn't taste like milk.


    I suppose you could also make this in a graham cracker crust, as a frozen pie!