Tuesday, June 28, 2011

Gluten-Free Brioche and Coffeecake

Time for our HBin5 baking group to venture into gluten free baking again.  This time, we are trying gluten free brioche.  The recipe is very similar to our challah and brioche recipes in "Artisan Bread in Five Minutes a Day."


I'm glad for the assignment, because I still have plenty of gluten free flours from previous assignments.  My version is made with a few changes.  Soy milk was used instead of cows' milk; this actually gave it a much sweeter taste.  Guar gum was used instead of xanathan gum; it's a bit less expensive.


My dough seems like a thick pancake batter.  After seeing the gluten free boule video on the authors' website, I realized that my "dough" is much thinner than theirs.  I found out that my measurements weren't correct for their method of measuring the flours.


First, a loaf was made.  I've had problems with the gluten free dough sticking to the plastic wrap before.  Therefore, I put an upside down glass bowl on top of it.  That seemed to work just fine.


A few days later, I decided to make a coffeecake with the thin batter.  Making the assigned cinnamon rolls just seemed too hard with this dough.  It would take a lot of extra flours to thicken it up.

A tube pan was used.  I started with a layer of dough, and smoothed it out.


Then I added the filling from the recipe, and added a top layer of dough.

 The coffeecake seemed to need a streusel topping, so I added that.

 The final baked coffeecake:


I tried turning the coffeecake onto a pizza pan, which is the largest flat pan that I own.  I would love a cake pan, but don't want more "gadgets" taking up room in my cupboards.


It's a good thing I took a picture of the cake in the pan, because it didn't come out perfectly.  But it did look better with the icing:

 My hubby really liked the coffeecake, with the orange flavoring in the icing.  I thought it was a bit too sweet, but that's probably due to the soymilk in the dough.

This is my makeshift cake pan!  My largest storage bowl, upside down on my pizza pan.  Hey, it works.

I think that I will try to use my gluten free flours in my regular baking with wheat flours.  Baking is a learning process, and there's plenty to learn with wheat baking.  I'll have this knowledge if I need to bake for a gluten free friend, though.

Thanks so much for stopping by.  I hope you enjoyed making this recipe, and will leave a comment.  Come by and visit again soon!

Judy

Thursday, June 16, 2011

Honey Graham Bread

For this baking group assignment, I decided to make half a batch.  Then, I made smaller size breads, rather than a two pound loaf.  That way, I can freeze them and only take out a bit of bread at a time for toast.


Honey Graham Breads, Before Rising

 
Honey graham crackers are a favorite snack of mine, so I was looking forward to making this bread.  It's a good thing, though, that I took the picture above.  I was also making anadama bread for the Farmers Market.  I thought I kept track of which mini loaf was which, but they got mixed up in the overnight refrigeration.

Anadama Bread?  Graham Bread?

It took me awhile to figure out which was the honey graham bread and which was the Anadama bread, but I did it. Can you tell?  I was able to compare my Anadama breads (the two at the right forefront) to a muffaletta style bread loaf from the same dough.  The Anadama breads have cornmeal in them, so they have a more "coarse, rustic finish" on top.  The honey graham breads had a slight cinnamon flavor.

Muffaletta style Anadama Bread in back
The honey graham bread tasted good, but I might modify the recipe to make it sweeter next time.  It is a nice whole wheat bread to share with friends, when I make this size.

 
Thanks for stopping by.  I hope you will leave a comment. Stop by again soon, I'll be baking again!

Sunday, June 12, 2011

Seeded Oat Bread, Gluten Free Loaves

Seeded Oat Bread

Wow, what a great bread!  I decided to make this loaf after seeing how wonderful it looked at the website of our co-baker, Guff  at http://oldpopsblog.blogspot.com/ . 

Also, this recipe isn't all whole wheat; I thought my husband would be ok with it.  After over a year of whole wheat baking, he commented that he would like some non-whole wheat breads.  It was a relief to learn that he really loved this bread!


Seeded Oat Bread Dough
This dough was really interesting--chock-full of nuts and seeds.  I made sure to use raw sunflower, pumpkin and sesame seeds.  I have made loaves with roasted seeds before, and they burned.  It seemed like the baking was considered a second "roasting."


Resting on the Peel
Crunchy, munchy loaves!
That's my newly spiral-bound HBin5 book!
The "letterfold" method of folding helped me make really nice loaves.  I wish, however, I had rolled the loaves on a counter with seeds sprinkled on it--as Guff did.  I found myself patting the seeds onto it.


Although it seems risky for me to bake at higher temperatures in my Thermador oven (burns the oven element out), I just craved those crusty loaves.  It was just thrilled to take these loaves out of the oven!!!


Not much left after dinner!


And now, a Gluten-Free recipe!:

I purchased quite a bit of gluten free flours through the course of this project.  Well, I felt it's time to use those flours again.

I decided to make the Gluten-Free Crusty Boule recipe, but as a loaf.

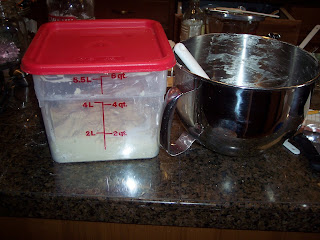
The dry ingredients were mixed in the rising bucket, before added to liquids
This is dough? 
After combining the ingredients, I mixed the ingredients at high speed for a few minutes. That technique was outlined in another gluten-free bread recipe.  It gave the bread structure.  It couldn't hurt, I figured.


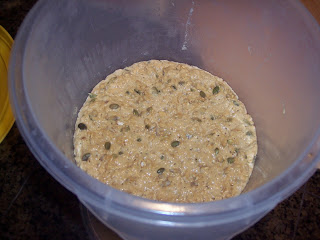
Before the "dough" rises
The bowl was scraped down, and the dough mixed a few additional minutes.  It didn't look like an impressive dough when it was set out to rise.

A nice rise in our warm sunroom!
Wow, what a nice rise.  I've heard that the dough "matures" nicely after rising and overnight in the refrigerator.  It's not the same as dough with gluten, but there's a nice combination of flours--tapioca, sorghum, and brown rice.  You don't get that in baking with gluten, normally.  Most people just stick with the standard wheat flour.


Thanks so much for stopping by.  I hope you will leave a comment.  Please return soon, I'll be baking again!

Wednesday, June 1, 2011

Almost Like Rye, But Gluten Free

I've been experimenting with gluten-free flours.  It's a whole different world of different flours to explore.  The techniques are different, and so are the challenges. 

A local mom and pop health food store is selling off their grocery items at a discount, so I snatched up some Bob's Red Mill teff flour to try for this recipe.  I just love rye bread, so I wanted to see how this bread would taste.

Teff dough, just after mixing in Kitchenaid
This dough mixed up slightly firmer than my other gluten-free doughs.  The other gluten-free doughs have mixed up like a loose, sticky paste.  This one held together much more, right after mixing.


Teff dough, after rising
The dough rose nicely.  Still, the texture was much stickier than dough with gluten.


I formed a boule on a piece of parchment, by constantly wetting my hands to shape it.  It's not possible to knead this dough!


I decided to make both a freestanding boule and a loaf.  A foil loaf pan was used because they are slightly smaller than my standard ones.  I was only using one pound of dough, so I wanted a smaller loaf pan.

The breads look nice, but I'm dissappointed that the boule came out a bit flat.  I might be to blame, though.  I had a number of things cooking (including some of our dinner), and so the breads went into the oven a bit late.
However, I wonder if rising the dough in a small, cloth-covered basket would help the bread keep it's shape?  I'd have to sprinkle the cloth with gluten-free flour or cornmeal, to make sure they don't stick.  Something to try next time....

And how did it taste and look inside? 


The bread tasted great, the caraway seeds added a lot of flavor.  The crumb looked nice, also.  I'd make this bread again if the teff flour weren't that much more expensive than regular rye flour.

Thanks for stopping by and visiting!  Please leave a comment.  What have you been baking?

Stop by again, soon.  It's fun to share baking.
Judy