Showing posts with label Handwise tips. Show all posts

Thursday, October 14, 2010

Whole Grain Garlic Studded Baguette, Whole Grain Pizza on the Grille

Whole Grain Margherita Pizza

Garlic-Studded Baguettes


For my "Healthy Breads in 5 Minutes a Day" baking group, I felt it was finally time to conquer my fears of making pizza on the grill.  Also, I decided to make my favorite baguettes with a different dough.

We had a choice of several whole grain doughs.  My choice was to try the Whole Wheat with Olive Oil dough again.  The first time I made this dough, it seemed to be a bit loose.  There's now a post-it note on my recipe that reads, "good for flatbreads."  Now that I have more experience, I've begun to adjust these recipes more.  Michelle, our host, is probably smiling about that!


White Whole Wheat flour was used, and slightly less water--about 1/4 cup less.  Using less water seemed to help this time.  The dough seemed firmer.  After the dough rose and was chilled overnight, it was time to bake!  Yaay!!!


Whole Grain Grilled Pizzas
It was time to brave the grill!  I've been  nervous about grilling pizzas.  There's the thought of the dough falling through the grates.  Also, it's my hubby who usually does the grilling, so I don't have much experience in this. He didn't want to do the pizzas.  Lastly, it's close to fire!  Need I say more?

For my first try, I used flour under the dough on the peel.  Lots of flour!  The pizza ended up with a "too much flour" taste.  Next time, I think I'll flour my peel by rubbing flour all over it--not dumping it on top. 

Getting the dough onto the grill was the toughest part.  We have a split grill.  It's great for small amounts of grilling.  You can fire up half the grill for two people, or use both sides for more people.  The problem for this type of grill is that the peel is too big for one side and there's not much "wiggle room."  

The pizza slid into a bunched up mass on the grill, with the side caught off the grill.  Quickly, I nervously straightened out the pizza.  Possibly I can find a smaller peel for the future.

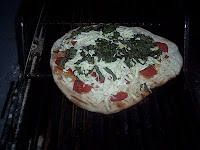
The dough was turned over when it began to bubble up, and olive oil was added.  Then the tomatoes and cheese were added.  We used "Follow Your Heart Vegan Gourmet" cheese.  Closing the lid for a few minutes helped the cheese melt some.
 

The sliced basil was added just before removing the pizza.

A little Wiki research--This is very similar Pizza Margherita, which was made in honor of the Queen consort of Italy--Margherita of Savoy.  The pizza toppings are fresh sliced tomatoes (well, I used canned diced), fresh sliced Mozzarella, and fresh basil leaves. It represents the colors of the Italian flag. It is believed to be the first pizza to use cheese--the pizzas we all know and love today.

There was about 1 1/2 pounds of dough left.  That would be enough for two smaller pizzas.  We decided to give the grilled pizzas another try.  I decided to test out the suggestions of several people in our group.  

Debbie felt that cornmeal works better than flour for sliding the pizzas from the peel.  

Guff and Joanna both felt that flipping the pizza onto the grill worked well. Guff felt that putting the pizza on parchment paper, flipping it so that the paper was on top, and then peeling it off partway through the cooking worked well.

Gwen, from our HBin5 group, agreed that using parchment paper gives good results in grilling.

Joanna mentioned a youtube video of Alton Brown's "Good Eats" show, where he flips the pizza onto the grill.   I am including it here, because there are a lot of great tips--flouring the peel (not overflouring it!), cooking tomatoes, and rolling out the dough.


Also, in this video, Alton Brown shows how to grill a flatbread over a gas burner!  This is wonderful for people who live in an apartment building or otherwise can't do outdoor grilling! He said it would even work for people living in a 5th floor walkup apartment in New York, as long as they have a gas stove.


The experiment--using cornmeal to slid one pizza onto the grill, and putting trimmed parchment paper under the other pizza.  The fire was kept medium low.


The crust that had cornmeal under it on the peel had the same problems as the one with the flour.  I shook the pizza to try to move it to the grill, and it bunched up into a mass over the fire.  Quickly, I moved it back into a larger piece.  But it lost its round shape; it's the one on the plate.


The pizza on the grill is the one that had parchment under it.  It moved easily to the grill, kept its shape, and cooked nicely.  We watched the pizzas carefully.  However, I'll try Guff's method of flipping the pizza crust so that the parchment is on top next time.  That may enable us to use higher heat.

We ate the pizza cooked on the parchment paper that night.  It was wonderful, served with fast totellini soup.


 Baguettes
I've made the garlic-studded baguettes before, and love the garlic-infused flavor from this method. This time, I decided to try omitting the stone or steam.  What would happen?  


letterfold technique
Twelve ounces (a bit larger than recommended) were used.  The baguettes were shaped using the letterfold 
technique, before stretching into a longer baguette.  Whenever there was resistance, I let the dough rest for a few minutes (so the dough wouldn't be so cranky!). 

The baguettes were place on my Silpat, on top of a baking sheet.  They were baked after baking a different bread, and the temperature was about 375 degrees.   After approximately 15 minutes, the breads were taken off the baking sheet and put onto the oven racks to firm up the bottoms.
Soft Crust Garlic-Studded Baguettes
These baguettes were wonderful  with tortellini soup.  I might continue making them this way, and you might want to try it.  For me, baking without adding the hot water and stone is a bit simpler.  Also, it takes less time and energy to heat the oven to a cooler temperature.

Grissini
I had some gluten free olive oil dough in the freezer. It was in the freezer for awhile, but looked fine. I figured it was good for flatbread. What did I have to lose by trying grissini and flatbread with that?!
I rolled 1/2 pound of dough out on parchment on a baking sheet, cut it into a rectangle (re-using the scraps) and drizzled olive oil on top.  The toppings were kosher salt and some leftover spicy spice mix from baking crackers some months back.  Then I cut the dough into strips; I made several groups of strips.  Then it was time to put the grissini in the oven to bake. Halfway thru baking, I took the pan out, separated the strips, (easy) and finished baking them. Easy, and yummy! A lot easier than moving the strips onto a baking sheet.  Crisp, too.


Sorry there aren't any pictures of the spicy grissini, but they went really fast!  So did the 2 pieces of spicy gluten free flatbreads...


Wherever, you are, I hope you are enjoying the beautiful fall colors.  As a former Southern California gal, seeing leaves change colors is new to me.  We just took a drive on the Blue Ridge Parkway to see the beautiful bright red, orange, and yellow leaf colors on the trees.  We were able to see the leaf colors at their peak!  I thought you would enjoy seeing a few of the pictures:

Grandfather Mountain, NC, from the Blue Ridge Parkway
Yours Truly, enjoying the Fall Colors
Grandfather Mountain has a mile-high swinging/suspension bridge which gives breathtaking views. 
Blue Ridge Parkway, Central Section, Moses Cone Memorial Park 

Handwise tips:  If you have hand pain, tendonitis, or arthritis or any other pain issues and want to make this recipe:  
  • My tip for this post is for the pizzas. By cooking two pizzas, we were able to freeze one pizza and eat one for dinner (cook once, eat twice!). 
This bread is one of the breads from the "Healthy Breads in 5 Minutes a Day" book.
The HBinFive Baking Group, started by Michelle of Big Black Dogs, is baking through all of the breads in this book.  To see what Guff, Debbie, Gwen, Joanne, Michelle, and my other HB5 baking buddies have made recently, check out The 21st HBinfive Bread Braid

Thanks for stopping by to visit! Come back soon, I'll be baking again often. I hope you will leave a comment below. I read every comment, and really appreciate your feedback. 

Monday, October 4, 2010

Pear Tarte Tatin, Apple Strudel Bread and Cranberry Pecan Sweet Rolls

For this braid, our baking group was able to pick between 2 doughs--whole wheat brioche, and pumpkin pie brioche.  Since we made pumpkin pie brioche before, I tried the whole wheat brioche.  What a wonderful dough--so nice and silky!  A joy to use, and didn't have a strong whole wheat taste.

This dough was made in my Kitchenaid mixer.  The liquid ingredients were placed in the bowl first.  The yeast, salt and vital wheat gluten were then sifted into some of the flour with my new battery operated sifter*** (see Handwise tips).  Jeff and Zoe posted to me that it would be ok to sift these ingredients with part of the flour. That should keep the vital wheat gluten from getting gummy.  They said to just be sure to mix everything well afterwards.


 Pear Tarte Tatin


This recipe was made with my dinner guests in mind, who love ginger and cardamom.  My hubby experienced too much ginger in one of my recipes, and now won't touch it.  Bosc pears were used, one of my favorite fall fruits!

The dough was made the night before, so it was time to make cook the pears.  Peeling the pears with my Dazey Stripper didn't work.
Will someone start making these again???

That was unusual.  This gadget is great for peeling apples or potatoes.  Now I only see the peeler (without the necessary blades!) on ebay.  The pears just seemed a bit too soft. 


So, the pears were peeled, cored, and sliced with my trusty paring knife.  We don't have a cast iron pan, so the pears were sauteed in our 11" Kitchenaid pan. 

The dough was rolled out to about 12".  To make the transfer easier, a pie-making trick was used.  I folded the dough in half, then in half again.  The corner of the dough was placed onto the center of the pan.  It was then simple to unfold the dough onto the pears.  


Because I was using a larger pan, I made really sure to tuck the dough underneath the pears:   


After baking it for about 20 minutes, the pear tarte tatin looked like this:


Five minutes later, I placed a serving tray on top and flipped (in what a guest called "an act of faith) the tarte onto the serving tray.

The pears needed a bit of readjustment, but it was just great that the tarte came out in one piece onto the platter!!!

Apple Strudel Bread

Yummy, yummy, yummy!  This bread is one of my definite favorites.  Instead of making doughnuts, I thought I would make this bread again.  However, this bread was made after an eventful day of cooking and entertaining guests.  Baking that day was my therapy, and I wasn't up for challenges.  Although the taste was fabulous, you'll see that it wasn't the "desired" shape.

Two pounds of dough were rolled out.  The filling of apples, cinnamon, raw sugar and walnuts was added.  There was my note on the recipe, from last time, to decrease the amount of raisins and walnuts--which I did.  

However, I couldn't tell whether my note about the apples was to use 2 or 3 medium apples.  Therefore, I decided to use one medium and one large apple.  That may have been my downfall in this recipe....

Before rising!
After rolling the dough into a long log, it was really too big to place into my prepared 8 1/2" x  4 1/2" loaf pan.  I was just too tired to dig up a larger loaf pan, spray it with oil and wash my current pan.  That's when I decided to fold the log in half and put it into the current loaf pan:  

There were holes in the dough, after the transfer.  They were patched with dough scraps, just as if it were a pie.  Halfway through the baking, I checked on the progress:   
  
Uh Oh!!!!

The long log should have been baked on a baking sheet.  Not only did the loaf bake over the sides, the dough scraps were falling off  (they were yummy!).  Thankfully, I put a piece of foil underneath the loaf pan.  At least I was alert enough to think of that....

Top of Apple Strudel Bread

Bottom of Apple Strudel Bread
As mentioned before, the final loaf wasn't pretty, but it was really tasty.  I ate this quickly, and I'm not sure my hubby got to taste it!  YUM!!!
  Cranberry Pecan Sweet Rolls

The last assignment for this braid was the Honey Caramel Sticky Buns.  I had made this before, and have vivid memories of the oven fire--Honey Caramel Sticky Buns and a "kitchen adventure."


Therefore, I decided to make simple sweet rolls.  Craisins sounded good.  The dough was rolled out, and the craisins were sprinkled onto the rectangle of dough.  When the dough was almost rolled up into a log, I thought "what about some sugar?"  So the dough was unrolled slightly, and some sugar was sprinkled onto the rectangle.
"Baking by Inspiration"


The log was cut into 2" slices which were placed on their sides.  There were some chopped pecans in the cabinet, so those were sprinkled on top.  After the baked rolls were cooled, a simple icing was drizzled on top:


These were shared with our happy crew of gardeners, our great neighbor (across the street), and my yoga teacher.  My hubby snacked on these also.  Well, at least he ate one out of the three recipes!


Handwise tips:  If you have hand pain, tendonitis, or arthritis or any other pain issues and want to make this recipe:  

  • The Handwise tip for this recipe comes from our HBin5 host--Michelle, of Big Black Dogs.  There seem to be 2 kinds of sifters, usually.  One is the squeeze handle, which can be very tiring on hands.  The other is a turn handle, which can also be tiring.  Michelle told me about her Norpro battery operated sifter:       
Battery Operated Sifter
At first glance, it was dissappointing that the sifter could only hold 4 cups.  However, it's just wonderful that it does all the sifting by itself--no handles to squeeze or turn. 
I will mention two aspects about this sifter:
  1. Make sure you put the handle in place properly, or it won't work well.  The flour will sift slowly.
  2. This may not be a good sifter if your hands are sensitive to vibration.  However, the sifting only lasts a short time.
This bread is one of the breads from the "Healthy Breads in 5 Minutes a Day" book.The HBinFive Baking Group, started by Michelle of Big Black Dogs, is baking through all of the breads in this book.  To see what my HB5 baking buddies have made recently, check out The 20th HBinfive Bread Braid

Thanks for stopping by to visit! Come back soon, I'll be baking again often. I hope you will leave a comment below. I read every comment, and really appreciate your feedback. 

Judy

IL BOLO, Italian bread with olive oil, anise, & honey and Apricot Noodle Pudding

IL BOLO


Our calendar for the HBin5 baking group said that this bread would be baked in a year.  Frankly, I don't always have that kind of patience!  Especially for a enriched bread having ingredients like this--honey, olive oil, vanilla, lemon zest, and anise seeds.  My curiosity was aroused!

I put together the dough one morning, and went to run some errands at 9:30 a.m. while the dough was rising.  I guess I really got into getting those errands done.  I didn't get home until 3:30, with the thought that the dough would be ok.  What could possibly happen?  


This is what I found when I came in the door:         


It was another one of my baking adventures, greeting me at the door!  I quickly scooped up the overflowing dough, and began shaping the loaves.  I told myself "any problems with the egg dough sitting on the counter over 2 hours will bake out at high temps..."  :)


The loaves were baked at 350 degrees for about 25 minutes, not the 35 minutes stated in the recipe. They were done at that time.


This bread was fabulous!  I brought it to a large dinner get together, and people really loved it.  The bread was soft, had a beautiful crust and tasted sweet.  The caterer is a cooking buddy, who kept nibbling at it also.  


I've been doing a lot of cooking lately, for our harvest festival.  Noodle pudding (kugel) is popular this time of year, and I would like to share one of our favorites:

Apricot Noodle Pudding
12oz.         wide noodles (one bag)
1/2cup       margarine
6                eggs
8oz.            sour cream (light)
16oz.          lowfat cottage cheese
1/2cup        sugar
1/4cup        milk (could use lowfat)
1/2cup        golden raisins  (dark raisins ok, too)
8oz.            dried apricots, cut up


Topping:
1 cup          corn flakes, crushed
1 cup          brown sugar
4oz.            margarine, softened


Directions:
Cook noodles until tender.  Drain.  Place in large pot or bowl and add 1/2cup margarine; set aside (margarine will melt).

Beat eggs; add sour cream, cottage cheese, sugar and milk.  Mix.   Add dry fruit, combine with noodles.  Pour into 9" x 13" baking dish. 

Mix corn flakes, brown sugar and 4oz. softened margarine in medium bowl.  With spoon, sprinkle small blobs of topping over kugel batter.  

Bake at 350 degrees for 1 hour. Cut when cool.

Kugel can be eaten hot as part of the main course.  It's also good cold, and as dessert.  Kugel may be frozen and reheated.

Serves 10-12


Handwise tips:  If you have hand pain, tendonitis, or arthritis or any other pain issues and want to make this recipe:  
  • My tip for this post is for the noodle pudding.  If I know that I am going to make noodle pudding in the near future, I cook the recipe's amount of noodles the same night that we are having pasta for dinner.   We then use the same hot water to cook the wide noodles for recipes like this.  After draining the noodles, I put them in the refrigerator or freezer bags.  Since I measure out the amount of noodles to match the recipe beforehand, it's a simple recipe to assemble.  I just melt the 1/2 cup margarine for the noodles, and add in everything else.  Also, that's one less pot to wash later--always a helpful thing.
This bread is one of the breads from the "Healthy Breads in 5 Minutes a Day" book.
The HBinFive Baking Group, started by Michelle of Big Black Dogs, is baking through all of the breads in this book.  To see what my HB5 baking buddies have made recently, check out The 20th HBinfive Bread Braid

Thanks for stopping by to visit! Come back soon, I'll be baking again often. I hope you will leave a comment below. I read every comment, and really appreciate your feedback. 

Judy


Monday, September 27, 2010

Pane all'Olive--Olive Bread

Pane all'Olive--Olive Bread


Several recipes in Jim Lahey's "My Bread" book have grabbed my attention.  Just looking at this olive bread recipe got my kalamata olive cravings going.  After a week of the cravings, this loaf just screamed "make me!"

For this bread, I used an 11.5 jar of kalamata olives.  It was just short of the amount in the recipe, but I wasn't going to go back to the store for another jar.  It was just enough, in my opinion.

Of  course, it was a very wet and easy to mix dough.     Here's a shot of the dough, after 5 hours of rising.  Notice the nice bubbles forming!


After quite a bit of research, I bought a 3.5qt Tramontina enameled cast iron dutch oven.  The 6qt size was just too heavy for me, even without the dough inside.  Mr. Lahey must be very strong, as he suggests the larger pots!  For this first use, the knob was covered in foil because it wasn't oven safe at 450 degrees.  Since then, the knob was replaced with a stainless steel knob.
The First Use of My Tramontina Enameled Cast Iron Dutch Oven!!!


The Pot, After it Was Seasoned...

Using my new enameled cast iron pot was really exciting.  I did a test where I tried to make a similar bread without a cast iron pot. Jim Lahey recipe--testing different baking methods.
The results varied when Corningware and a baking stone were used. So I was excited to try Jim Lahey's suggested method.


Although the recipe called for the bread to be baked at 500 degrees, my pot is ovensafe to 450 degrees.  My Ove Glove mits are ovensafe to 450 degrees.  Cooking at 500 degrees and manipulating a pot can have some anxiety.  So the temperature used was 450 degrees.  

The bread was just great, but it probably needs to be baked a bit longer at 450 degrees.  Although the digital thermometer registered that the bread was done, it was a bit gummy in the middle.  I'll have to make sure to take the temperature reading in the middle next time.

Definitely a "keeper" recipe, and it filled my olive craving!  I already have my eye on his walnut bread recipe....

Jim Lahey's Recipe, Pane all'Olive


 Handwise tips:  If you have hand pain, tendonitis, or arthritis or any other pain issues and want to make this recipe,
Using my Vidalia Chop Wizard
great measurements!
  1. Rather than chop the olives on a cutting board or cutting them with a scissors, I used my Vidalia Chop Wizard. I can press down on the grid of blades (see extra blade grid on top of my dough bucket) with my whole forearm and chop a nice amount of olives into the container.  Using my whole forearm gives me more strength.  The container has markings for cups, and comes apart easily.  The Chop Wizard soaks in my dough bucket, after use, for easier cleaning.     
  2. Soak all your tools in your empty dough bucket or a pan when you are finished using them.   That way, you can wash them easily later (or tomorrow!)  Give yourself the permission of time to clean up much later.

Thanks for stopping by to visit! I hope you will leave a comment below. I read every comment, and really appreciate your feedback.   And come back soon, I'll be baking again often.

Judy

Monday, September 20, 2010

100% Whole Grain Maple Oatmeal Bread


Maple Oatmeal Bread, mini loaf

There wasn't much time to make this dough, but much time wasn't needed!  That's the beauty of this type of baking.  The most time was spent buying the wheat germ for this recipe and quinoa for the next loaf.

Raisins were added, after hearing reviews of this bread from other group members.  As usual, I rinse my dried fruits to clean them.  This also keeps the fruit from soaking up liquid from the dough.

Dough, next day

The dough was rather wet, but I didn't mind.  I knew that I would be making mini loaves.  


The next day, the dough was stiffer.  It is possible that the raw oatmeal had absorbed some of the liquid.  Still, it wasn't easy to do the gluten cloak.  

We had a lot of plans for the day--building our harvest booth.  So I quickly covered the pans to let them rise, set two timers (one to turn on the oven awhile before actual baking), and went outside to start work on the booth.

I had made half a recipe, and it was just enough for 3 mini loaves.
Ready to rise in mini pans

When the second timer went off, the loaves were put into the oven.  Because they were mini loaves, they would bake sooner.  I kept setting timers for 10 minute intervals, and took them out when the internal temperature said 195 degrees.
Yummy, full of raisins and flavor!
The breads were a really nice snack for all of us building the harvest booth!  Nice crumb and flavor.  My friend, Debbie, said that the raisins really made the loaf!  Even my hubby said that he really liked it.  We all felt the loaf would be great with butter.  Next time, I might add some walnuts.  

I think I'll have another piece right now--excuse me for a minute...

Mmmmm, tastes great with honey butter!

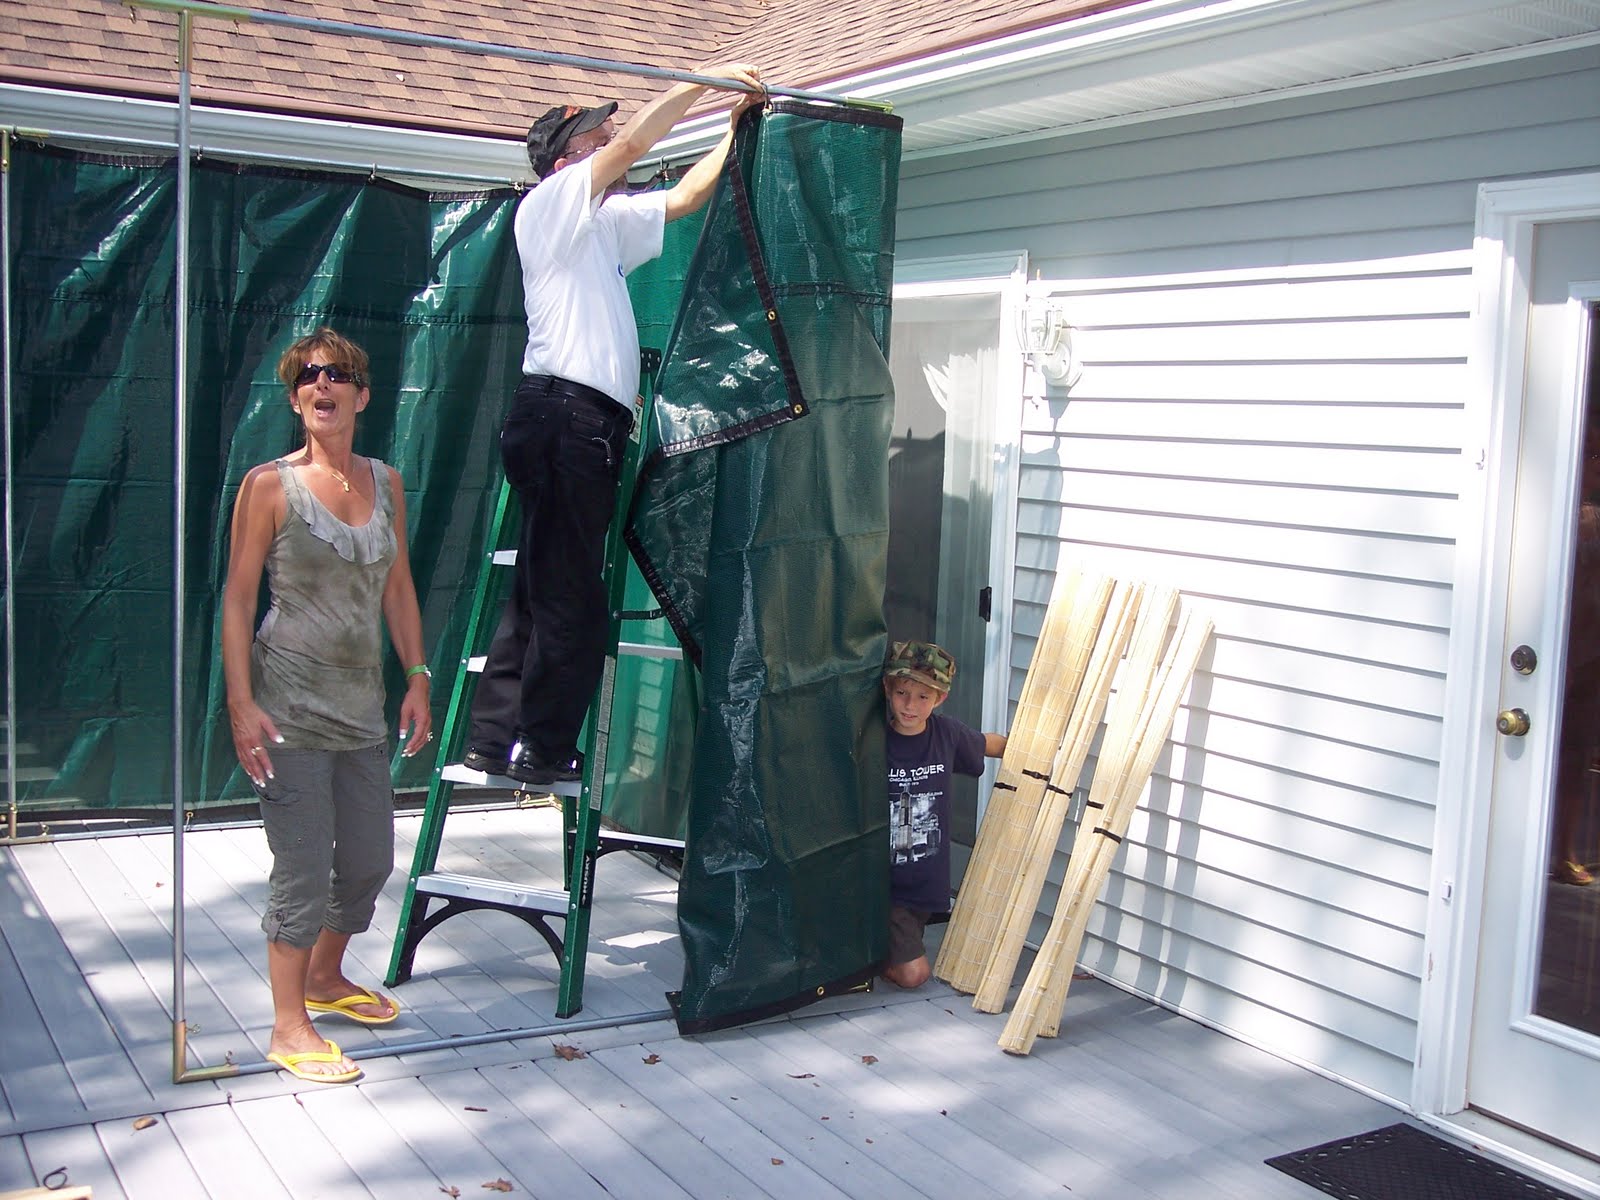
What a great treat to have while we built the booth, and to give a loaf to my friend.  Here's some pictures of our harvest booth: 


Putting up the "walls"


Our crew, the booth all finished.  The "roof" is bamboo mats, so you can see the stars at night.  Peyton, who is 9, is a pro at putting up the lights.  We will be adding Chinese decorations later on, for our Asian theme.


The booth, lit up for night.  We need to add more decorations, a table, chairs, and lots of happy people!  Our friends look forward to this celebration every year!


Handwise tips:  If you have hand pain, tendonitis, or arthritis or any other pain issues and want to make this recipe:  
I guess the best tip for this recipe is to add the dried fruits into the water/dough, when you are making the dough. And rinse the raisins--you will be surprised how dirty raisins can be.

This bread is one of the breads from the "Healthy Breads in 5 Minutes a Day" book.
The HBinFive Baking Group, started by Michelle of Big Black Dogs, is baking through all of the breads in this book.  To see what my HB5 baking buddies have made recently, check out welcome-to-the-19th-hbinfive-bread-braid/">The 19th HBin5 Bread Braid
 
Thanks for stopping by to visit!  Come back soon, I'll be baking again often.  I hope you will leave a comment below.  I read every comment, and really appreciate your feedback.


Judy

Thursday, September 16, 2010

100% Spelt Bread, Plain and Simple


The assigned HB5 group bread was a 100% whole wheat bread, but we had the option to use spelt flour.  There was only enough spelt flour for one bread, and this seemed a good time to bake it.

100% Spelt Bread, Plain and Simple


The dough for this bread seemed quite loose, even after refrigerating overnight.  Our book says that both whole wheat flour and spelt flour weigh the same.  I wonder if they absorb flour the same way.

The next day, the consistency was like our gluten free breads.  The dough  was hard to shape.  I decided to bake the bread in a loaf pan.  The bread is shown above.  It was a nice bread; we really like spelt!

That's the bread, plain and simple.

 Handwise tips:  If you have hand pain, tendonitis, or arthritis or any other pain issues and want to make this recipe,
  1. You might space it out over a few days.  Make the stored dough several days before.  You don't have to bake on the same day, that's the beauty of this dough!
  2. A mixer or food processor can help you.  You could put soapy water in it and run it for a few seconds to help clean it after removing the dough.  
  3. Then, if you are using a food processor, remove the dough hook/blade so that you can fill up the bowl even more.  Put an empty (cleaned)  container from 35mm film upside down, over the center portion and you can fill it up higher to soak. The water shouldn't leak out!
  4. When you shape it, let the dough rest if it resists stretching out.  Wait 10-15 minutes after doing the gluten cloak, and it easily should be able to be shaped.  Good time to have a seat and rest your hands!
  5. Soak your tools in your empty dough bucket or a pan when you are finished using them.   That way, you can wash them easily later (or tomorrow!)  Give yourself the permission of time to clean up much later.


This bread is one of the breads from the "Artisan Breads in 5 Minutes a Day" book.
The HBinFive Baking Group, started by Michelle of Big Black Dogs, is baking through all of the breads in the "Healthy Breads in 5 Minutes a Day" book.  To see what my HB5 baking buddies have made recently, check out  HBin5, 19th bread braid


Thanks so much for stopping by.  I hope that you will leave a comment.  And please stop by again soon, to see what's baking in my kitchen!

Judy 

Friday, September 3, 2010

Baking Swedish and Norwegian Breads


Judy & Kitty Making Norwegian Jukelage, waving Norway's flag


This baking adventure started out with my baking Swedish Limpa Bread from AB5.  The combination of orange zest, cardomom, anise and rye seemed interesting.  Therefore, I postponed my group's HB5 asssignment for this week.  These breads just couldn't wait to be baked!

While freshly grinding the anise seeds and cardomom pods, from the health food store, the house smelled wonderful!  The dough went into the fridge overnight, to make it easier to handle when shaping. 

Just before the loaf went into the oven, a cornstarch glaze was applied.  A sharp knife was used to cut a scallop pattern into the dough.  More cardamom, anise, and sugar was sprinkled on top.  Here's a picture of the bread, just before it went into the oven.


While eating the loaf for dinner, my husband learned he didn't like the flavors of anise and cardomom.  Well, you can always learn something new about your spouse!

That's when I thought about my friend, Kitty.  I love to talk to people about baking, and about all the baking styles of different countries.  When Kitty and I talked about baking, she mentioned her favorite Norwegian bread--julekage (pronounced yooleekaka).   

Kitty has been extremely busy in her job, and hasn't baked in awhile.  Since the AB5 way of baking might help her, I invited Kitty to bake julekage at my house.  She was excited to see how she could bake the AB5 method.  Julekage is actually a variation of challah, which is in the AB5 book.  We just added raisins (Kitty's choice), cardomom, and anise.


Here's a picture of Kitty, mixing up a batch of dough from the AB5 book.  She enjoyed using my Danish dough whisk.


Two hours later, the dough was ready to be shaped.  Look at that beautiful rise!!!  And the smell of even the dough was wonderful.
That's the flag of Norway on the top of this "dough mountain."


Kitty said that her family makes 3-strand loaves which are sliced.  They are eaten as part of breakfast or dessert.  Kitty learned this shape from her mom, who learned it from her dad's mom.   Kitty said that different families might shape their jukelege differently.  They also make rolls, which are easy to pack for a snack.

Here's a picture of the rolls, fresh from the oven.  We had measured out 3 ounces of dough for each roll.  


The rolls, after icing them with Kitty's special icing recipe. 


Kitty's Danish Almond Icing
1 cup powdered sugar
2 TBSP water
1 tsp vegetable oil
1/2 tsp almond extract

Mix all the ingredients together.  Add water until it becomes thin enough to drizzle.  Makes 1/2 cup
After drizzling the icing on the jukelage as it cooled, we put almond slivers on the top of the icing as the cooled.

 
The finished, braided loaves. 

Kitty asked her mom how to store the loaves so that the icing wouldn't come off.  Kitty's mom said that people usually eat them up right away--no leftovers!  But she said to store them in a paper bag overnight and then put the paper bags in the freezer bag to freeze them.  That way, the icing shouldn't rub off.

Kitty was thrilled to take home some of the remaining dough to make rolls later in the week.  And we enjoyed some wonderful Norwegian treats!

More Swedish Limpa Bread:

Swedish Limpa Bread
There was still some leftover Swedish Limpa bread dough, so we made another loaf.  It was fun making patterns in this loaf.


For the last pound of limpa bread dough, we decided to make muffins.  Following Kitty's julekage idea, muffins would be packable for a snack.  Here's Kitty, putting a mixture of cardomom, anise, and sugar on top.


The muffins baked up really well.  They only took about 20 minutes to bake.


The spices of cardamom and anise in these breads were fascinating to me.  I have used cardamom in Indian cooking.  How did it get to Sweden?  

Wikipedia gave me an answer.  It just had to do with the ancient spice routes!  The first Dutch expedition left from Amsterdam (April 1595) for South East Asia. Another Dutch convoy sailed in 1598 and returned one year later with 600, 000 pounds of spices and other East Indian products.  How cardamom got to Scandinavia from India

So it was the Dutch who first brought these spices to countries like Sweden, Norway and Holland.

When Kitty came over to bake julekage, she said that her great grandparents owned a shipping company.  They would travel to India and all over the world, bringing spices back to Norway.  Wow, that really brought history to life for me!

Well, we had an absolute blast baking together!  All my husband heard was the two of us laughing and singing ("Let's do the gluten wrap, again!...").  Also, the house smelled wonderful.  While the muffins were baking, Kitty went to feed out koi fish in our pond.  When she returned to the kitchen, she said she was just in love with the wonderful aroma.  It reminded Kitt of Christmas baking from her childhood.  What a wonderful memory!


We hope you have fun baking these breads.  For some helpful Handwise tips, click on this link:  Helpful Handwise tips, near the middle of the page

This bread is one of the breads from the "Artisan Breads in 5 Minutes a Day" book.
The HBinFive Baking Group, started by Michelle of Big Black Dogs, is baking through all of the breads in the "Healthy Breads in 5 Minutes a Day" book.  To see what my HB5 baking buddies have made recently, check out The 19th HBin5 Bread Braid

Thanks for stopping by to visit!  Come back soon, I'll be baking again often.  I hope you will leave a comment below.

Judy