 |
| Whole Grain Margherita Pizza |
 |
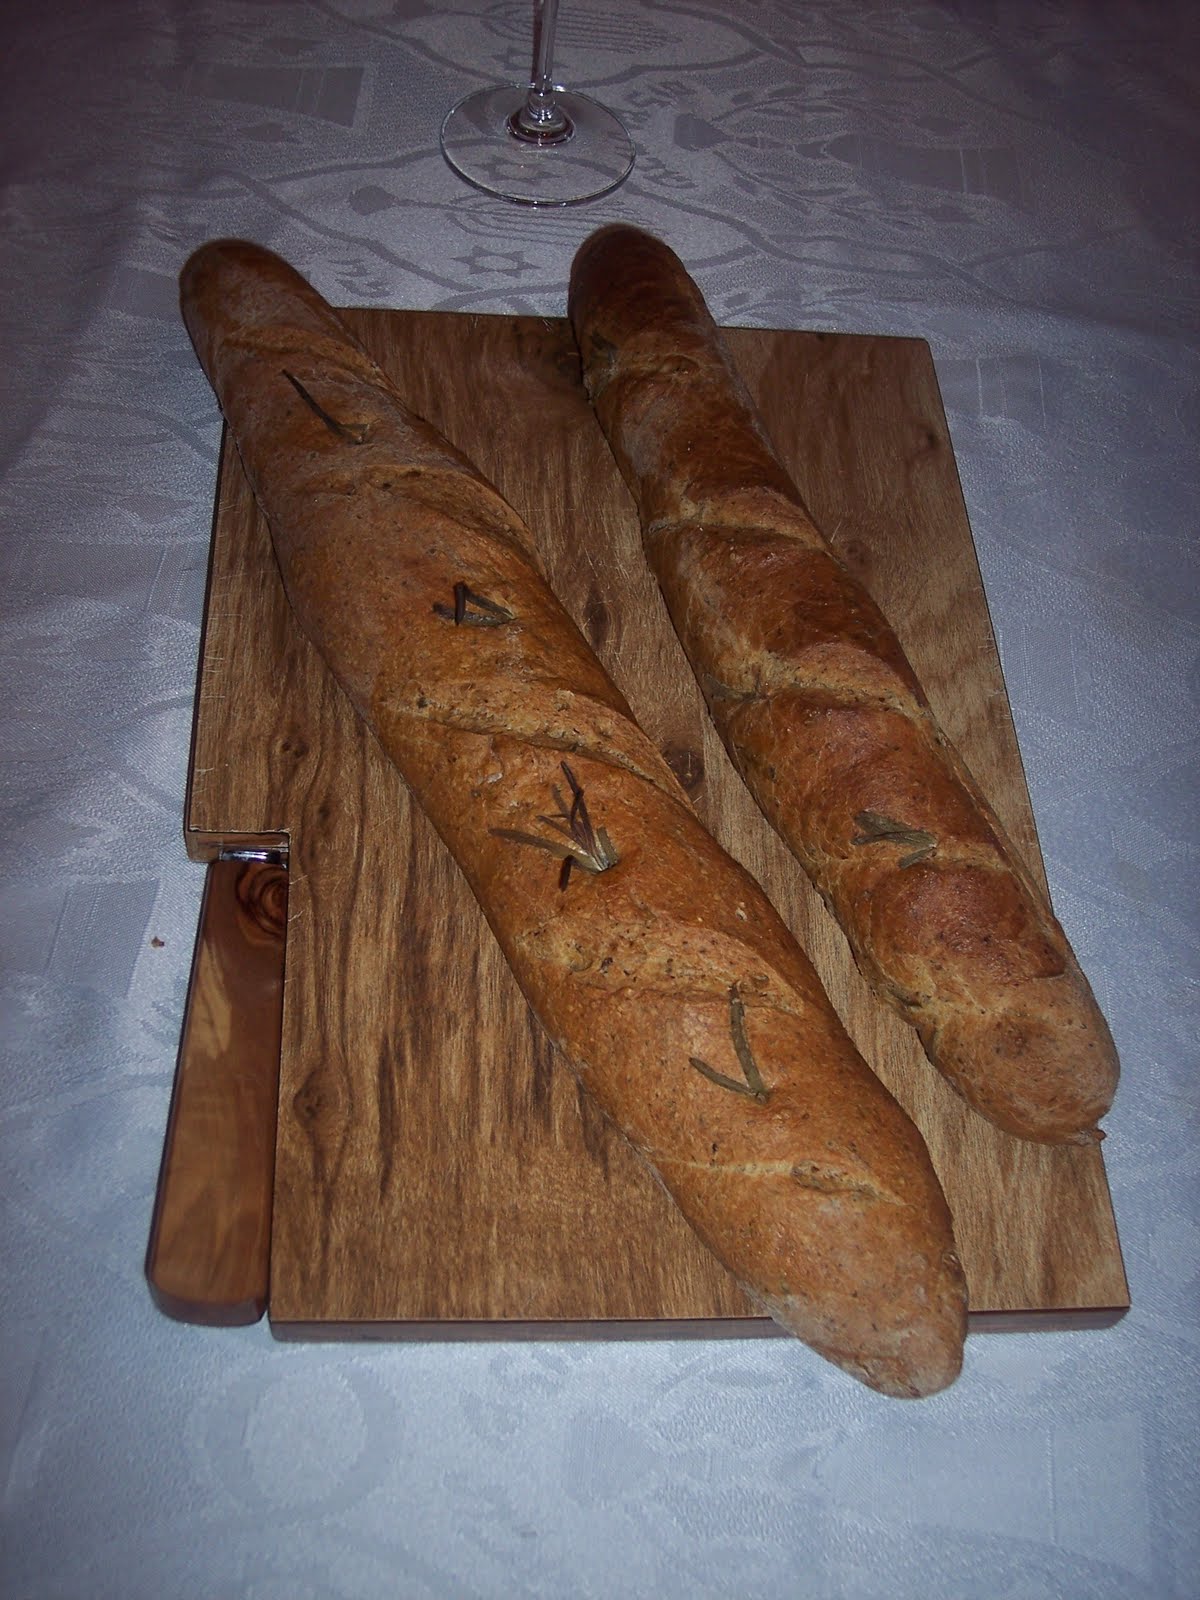
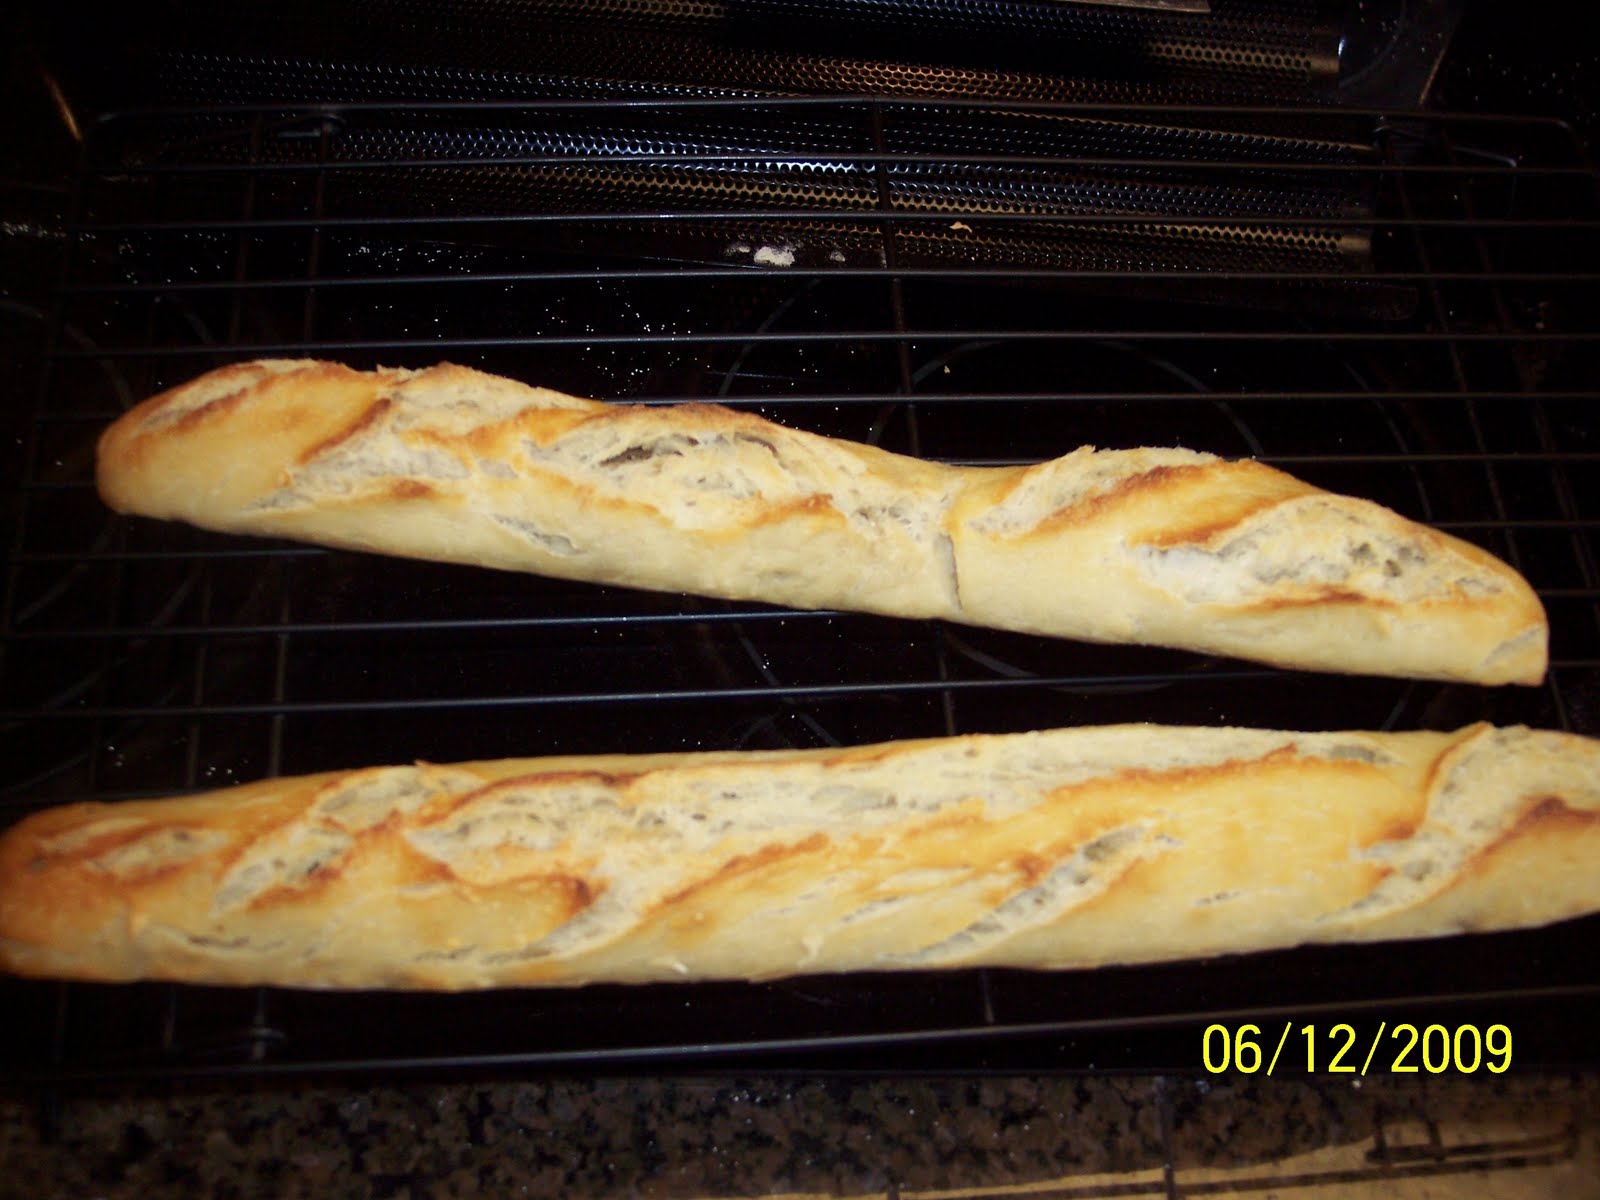
| Garlic-Studded Baguettes |
For my "Healthy Breads in 5 Minutes a Day" baking group, I felt it was finally time to conquer my fears of making pizza on the grill. Also, I decided to make my favorite baguettes with a different dough.
We had a choice of several whole grain doughs. My choice was to try the Whole Wheat with Olive Oil dough again. The first time I made this dough, it seemed to be a bit loose. There's now a post-it note on my recipe that reads, "good for flatbreads." Now that I have more experience, I've begun to adjust these recipes more. Michelle, our host, is probably smiling about that!
White Whole Wheat flour was used, and slightly less water--about 1/4 cup less. Using less water seemed to help this time. The dough seemed firmer. After the dough rose and was chilled overnight, it was time to bake! Yaay!!!
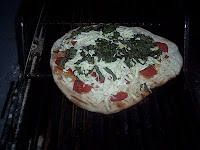
Whole Grain Grilled Pizzas
It was time to brave the grill! I've been nervous about grilling pizzas. There's the thought of the dough falling through the grates. Also, it's my hubby who usually does the grilling, so I don't have much experience in this. He didn't want to do the pizzas. Lastly, it's close to fire! Need I say more?
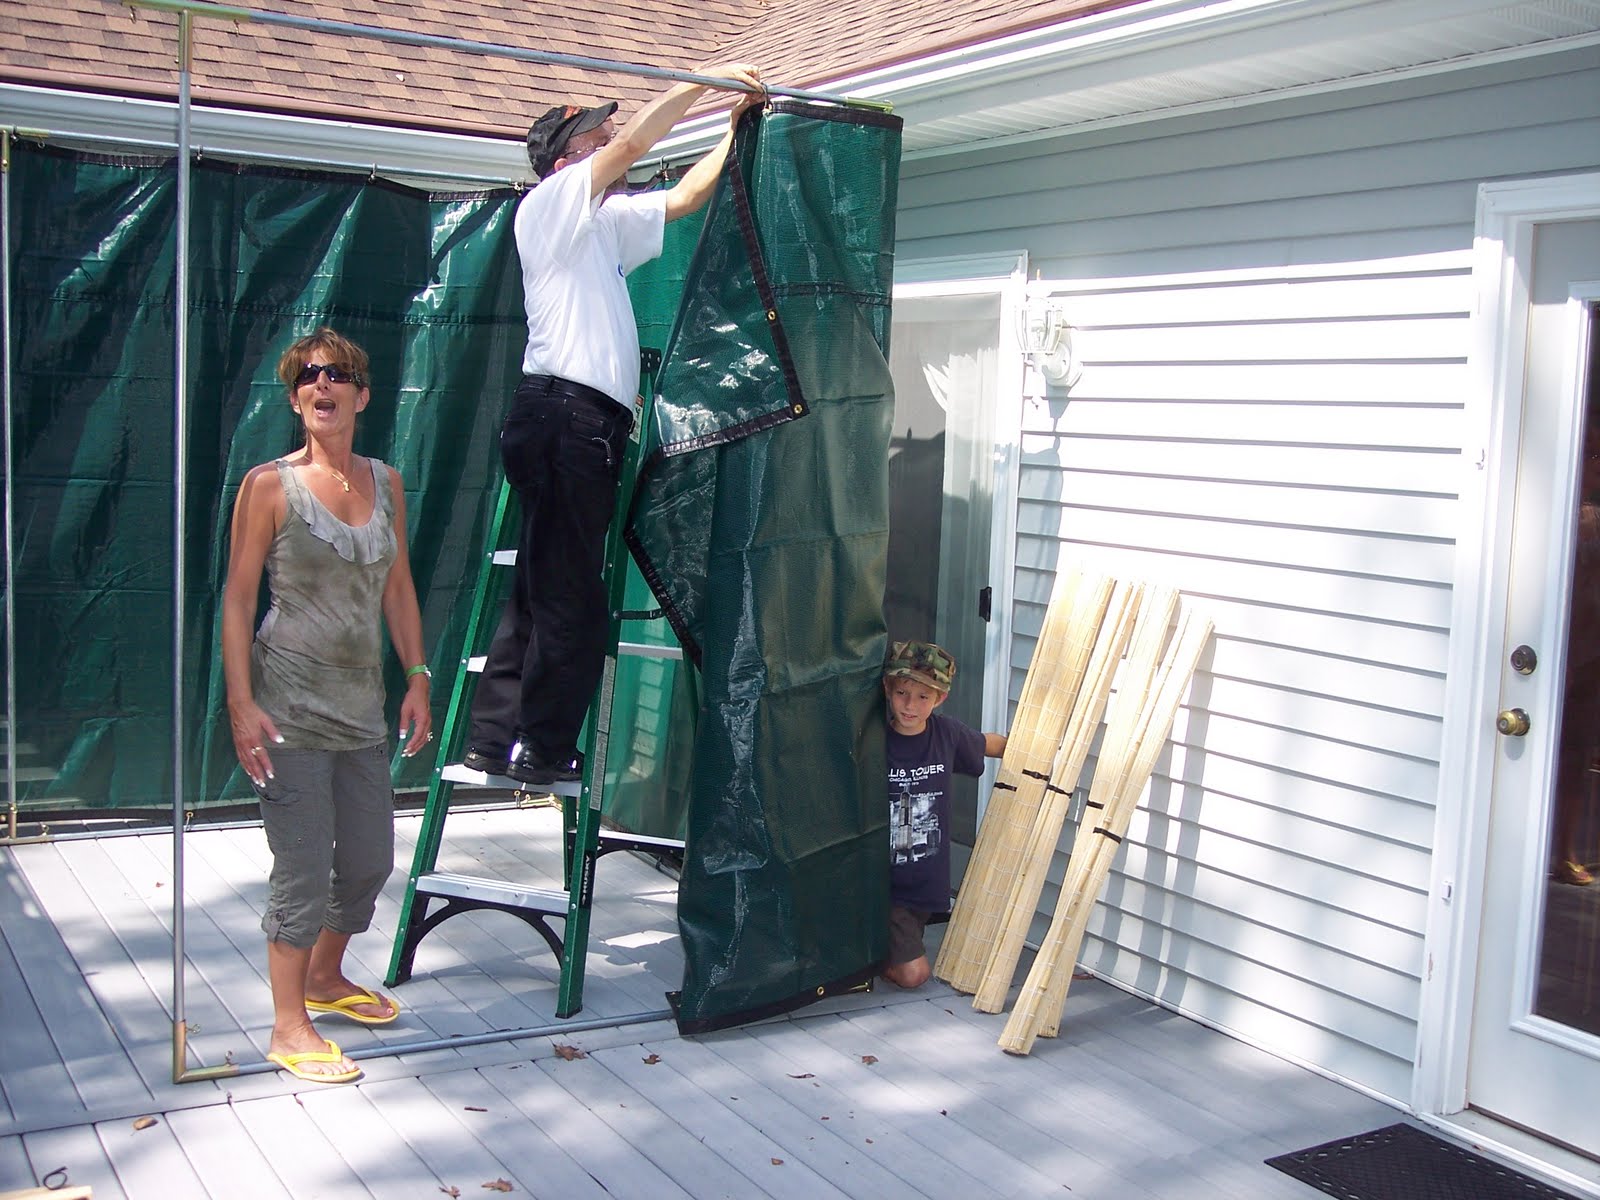
Getting the dough onto the grill was the toughest part. We have a split grill. It's great for small amounts of grilling. You can fire up half the grill for two people, or use both sides for more people. The problem for this type of grill is that the peel is too big for one side and there's not much "wiggle room."
The pizza slid into a bunched up mass on the grill, with the side caught off the grill. Quickly, I nervously straightened out the pizza. Possibly I can find a smaller peel for the future.

The dough was turned over when it began to bubble up, and olive oil was added. Then the tomatoes and cheese were added. We used "Follow Your Heart Vegan Gourmet" cheese. Closing the lid for a few minutes helped the cheese melt some.

The sliced basil was added just before removing the pizza.
A little Wiki research--This is very similar Pizza Margherita, which was made in honor of the Queen consort of Italy--Margherita of Savoy. The pizza toppings are fresh sliced tomatoes (well, I used canned diced), fresh sliced Mozzarella, and fresh basil leaves. It represents the colors of the Italian flag. It is believed to be the first pizza to use cheese--the pizzas we all know and love today.
There was about 1 1/2 pounds of dough left. That would be enough for two smaller pizzas. We decided to give the grilled pizzas another try. I decided to test out the suggestions of several people in our group.
Debbie felt that cornmeal works better than flour for sliding the pizzas from the peel.
Guff and Joanna both felt that flipping the pizza onto the grill worked well. Guff felt that putting the pizza on parchment paper, flipping it so that the paper was on top, and then peeling it off partway through the cooking worked well.
Gwen, from our HBin5 group, agreed that using parchment paper gives good results in grilling.
Joanna mentioned a youtube video of Alton Brown's "Good Eats" show, where he flips the pizza onto the grill. I am including it here, because there are a lot of great tips--flouring the peel (not overflouring it!), cooking tomatoes, and rolling out the dough.
Also, in this video, Alton Brown shows how to grill a flatbread over a gas burner! This is wonderful for people who live in an apartment building or otherwise can't do outdoor grilling! He said it would even work for people living in a 5th floor walkup apartment in New York, as long as they have a gas stove.
The experiment--using cornmeal to slid one pizza onto the grill, and putting trimmed parchment paper under the other pizza. The fire was kept medium low.

The crust that had cornmeal under it on the peel had the same problems as the one with the flour. I shook the pizza to try to move it to the grill, and it bunched up into a mass over the fire. Quickly, I moved it back into a larger piece. But it lost its round shape; it's the one on the plate.
The pizza on the grill is the one that had parchment under it. It moved easily to the grill, kept its shape, and cooked nicely. We watched the pizzas carefully. However, I'll try Guff's method of flipping the pizza crust so that the parchment is on top next time. That may enable us to use higher heat.
We ate the pizza cooked on the parchment paper that night. It was wonderful, served with fast totellini soup.
Baguettes
I've made the garlic-studded baguettes before, and love the garlic-infused flavor from this method. This time, I decided to try omitting the stone or steam. What would happen?  |
| letterfold technique |
technique, before stretching into a longer baguette. Whenever there was resistance, I let the dough rest for a few minutes (so the dough wouldn't be so cranky!).
The baguettes were place on my Silpat, on top of a baking sheet. They were baked after baking a different bread, and the temperature was about 375 degrees. After approximately 15 minutes, the breads were taken off the baking sheet and put onto the oven racks to firm up the bottoms.
 |
| Soft Crust Garlic-Studded Baguettes |
Grissini
I had some gluten free olive oil dough in the freezer. It was in the freezer for awhile, but looked fine. I figured it was good for flatbread. What did I have to lose by trying grissini and flatbread with that?! I rolled 1/2 pound of dough out on parchment on a baking sheet, cut it into a rectangle (re-using the scraps) and drizzled olive oil on top. The toppings were kosher salt and some leftover spicy spice mix from baking crackers some months back. Then I cut the dough into strips; I made several groups of strips. Then it was time to put the grissini in the oven to bake. Halfway thru baking, I took the pan out, separated the strips, (easy) and finished baking them. Easy, and yummy! A lot easier than moving the strips onto a baking sheet. Crisp, too.
Sorry there aren't any pictures of the spicy grissini, but they went really fast! So did the 2 pieces of spicy gluten free flatbreads...
Wherever, you are, I hope you are enjoying the beautiful fall colors. As a former Southern California gal, seeing leaves change colors is new to me. We just took a drive on the Blue Ridge Parkway to see the beautiful bright red, orange, and yellow leaf colors on the trees. We were able to see the leaf colors at their peak! I thought you would enjoy seeing a few of the pictures:
 |
| Grandfather Mountain, NC, from the Blue Ridge Parkway |
 |
| Yours Truly, enjoying the Fall Colors |
 |
| Blue Ridge Parkway, Central Section, Moses Cone Memorial Park |
Handwise tips: If you have hand pain, tendonitis, or arthritis or any other pain issues and want to make this recipe:
- My tip for this post is for the pizzas. By cooking two pizzas, we were able to freeze one pizza and eat one for dinner (cook once, eat twice!).
The HBinFive Baking Group, started by Michelle of Big Black Dogs, is baking through all of the breads in this book. To see what Guff, Debbie, Gwen, Joanne, Michelle, and my other HB5 baking buddies have made recently, check out The 21st HBinfive Bread Braid
Thanks for stopping by to visit! Come back soon, I'll be baking again often. I hope you will leave a comment below. I read every comment, and really appreciate your feedback.


