Wednesday, December 10, 2014

Repurposing a Slacks Hanger to Make Fondant Bows

While taking the Wilton Course 3, Fondant and Gum Paste, I saw a wonderful video on how to make fondant bows more easily. It's a real pain to take up counter space while the loops dry on their sides, especially if you make several bows.  Her way seemed much neater, and took up less space. The gal making the video sells cake supplies and has done many celebrity cakes.

She showed a bowmaker that they sell for $40 plus shipping.  It's made from PVC pipe.  She said it's easily made, but they sell so many that they get the PVC for less money.  So she said the cost would be less purchasing from her.

I was in my closet after seeing the video, and saw my slacks hangers.  Boom!  A light bulb went on!!!  I thought they would work for making bows.  After covering the rungs with plastic wrap and testing them out, I found they worked perfectly:


Using Kosher Symbols on Cake Decorating Products for Vegetarians


The Wilton Course 3, Fondant and Gum Paste Course, that I  just completed was a wonderful experience.  At the beginning, our teacher requested that we not to ask her about unusual ingredients like agar agar.  I had a feeling that these people were looking for vegetarian fondant, as I was.  I had checked Youtube, and all the vegetarian recipes for fondant had agar agar.

Most marshmallows, used to make fondant, are not vegetarian. The vegetarian marshmallows just don't seem to work as well. As the video below shows, marshmallow fluff is different.  That's probably why people were looking for the vegetarian version.

There was another comment in one of my baking groups about red coloring in products coming from carmine.  Carmine is a bug extract.  I knew this wasn't possible for this product, because the product had a kosher symbol.  Bugs aren't kosher (appropriate, biblically clean).

After hearing these comments, I thought I would make this video to help people know how to find kosher symbols on product labels.  Many people who are vegetarians, including Seventh Day Adventists, look for these symbols.   These symbols have helped me a lot in looking for vegetarian foods.


Kosher products fall into one of three categories:

Meat:  beef, lamb, chicken
Dairy:  milk products
Parve:  eggs, fish, fruits, vegetables.  This is a "neutral" category--non meat/non milk


what's not kosher:  bugs, pork, shellfish...

How it works:  The certifying organization goes into the plant.  They check the processing of the product.  They check the ingredients from the initial source--each individual ingredient--to see what other ingredients with which it came into contact.  It's a very thorough investigation, which can help identify vegetarian products!

There are many kosher certifying agencies, each with their own symbol.  A plain "K" might not be  considered as reliable because it can't be a registered trademark.  A K with a circle around it would be a different agency and trademarked symbol.

In the carmine (bug) example above, the red color dust product has a kosher certification.  It doesn't have carmine. The orchid pink, however doesn't have kosher certification.  That's because the label lists carmine.

The Wilton fondant has a kosher certification, so there shouldn't be a concern for people wanting a vegetarian fondant.   No need to learn to use agar agar to make fondant!


Wilton lists which products are kosher in their Course books, but the products can change over time; the books may be out of date.

I hope this helps vegetarian cake decorators and/or their vegetarian and vegan clients.

Thursday, December 4, 2014

How to Make a Clock Cake...


...and make your spouse happy!

NPR Morning Edition "Programming Clock"


It all started with a Facebook photo of this cake:


National Public Radio (NPR) changed their programming segments around.  Local stations had to reprogram where they put news and underwriting to comply.

My husband is a public radio engineer.  He worked with his station to make the changes.  On Facebook, he chatted with other radio engineers.  After more than 15 years with the same hourly programming setup, engineers were scrambling to try to make the changes.  They had to find features to fit in small minute to four minute segments.  This is the clock for Morning Edition, which has the most changes:

New NPR Morning Edition "Clock"


My husband saw a picture of the buttercream-iced cake.  It was probably enjoyed at NPR headquarters.  Most likely, it was an edible image that many instore bakeries do.  Hubby wanted a cake like this!

At the same time, I was taking the Wilton Course 3--Fondant and Gum Paste Course.  I told him that I would make him a cake in fondant as my course cake.  He was thrilled!

For the last class, we brought a one layer cake to class that was crumb coated.  That's the thin one layer of icing to trap the crumbs.  We learned to cover the cake in fondant during class.

Now the decorating began!


I made several copies of the clock.  One would be used for placement.  The one would be used for cutting the pieces of the clock.  I thought of making a tracing, (as we did with piping gel in the buttercream Course 1), but I didn't know if it would work.  i used the tracing as a placement guide.


After finishing the cake I figured out how to do the tracing.  Since it uses a backwards image, I didn't think that I could write on the back of the paper copy to trace it.  Then I figured out how to get a backwards copy on my printer!  It's called "mirror image!"

First apply a thin coat of Crisco on top of the cake.  Then, remove Crisco with a paper towel.  Your cake should feel smooth to the touch.  Then trace the logo with a 2b pencil if you have on.  A #2 will work but not as good as #2b graphite pencil.  After you place the tracing side down on cake you have to then trace over pattern to get it to transfer on to Fondant cake.  Use a colored pencil to trace over pattern so that you can tell where you have traced.  If you apply to much Crisco & didn't wipe off of cake, the pattern will not transfer on to cake. You must turn the tracing side down on to fondant cake & then trace over your pattern with a pencil again.  


Since the main colors of the clock are gray with a white center, I made the beginning of a topper:


After the fondant was totally dry, I was able to write "Morning Edition" onto the clock face with extra fine edible ink markers.  I picked those up from Michaels.  From there, it was just a matter of cutting the colored pieces of the clock.

Luckily, I had some special tools! 
I got this kit some years ago, as a gift.  My company gave them out as premiums during my sales days.    I don't whittle or work with wood, but I just couldn't toss mine!  Finally, the kit has found a purpose for me--fondant!  The X-Acto knife worked perfectly!


My teacher said that fondant pieces could be added to the cake with either piping gel or a thin layer of Crisco.  The benefit of using Crisco is that the pieces can be moved, so I did that.  Just in case.

Now it was time to do the "legend" of the colors.  I debated between making appliques on the side, or covering a larger fondant board.  I chose putting the legend on the side of the cake.  My new Wilton fondant ribbon cutter made the job easy!


I used the rollers with the straight sides to make the appliques on the sides of the cake.  Here are some views of the finished cake.  A one layer cake, in my opinion, looks even more like a clock:


Because the cake was done in fondant, hubby's Facebook friends remarked that it was 3-D.  He was so happy, he sent pictures of the cake to many of his public radio friends.  It was lots of fun, and we got many appreciated comments.


This method would also work for another type of clock, and probably a record.  There's a lot of detail work, and it did take quite awhile.  The great thing about the fondant is that it kept the cake moist.  It was really tasty!!!


Thank you so much for stopping by!  I hope that this post helps you make some fun clocks!


Wednesday, December 3, 2014

Chocolate Eclairs!


This month, our Avid Bakers group will be baking the King Arthur Flour recipe for eclairs.  I chose chocolate eclairs.  Hubby loves chocolate, and I wanted to make sure I would have help eating them.

I've never made this type of eclair pastry, which also makes cream puffs, so this would be interesting--if I can get a chunk of time to make the ingredients. Although we are showing our house a lot to sell it, I gambled that there would be very few showings on a Monday.  I made them on a Monday, and didn't have any agents interrupting me.  A good gamble!

The dough seemed strange to make, because it is cooked before being blended. Water, butter, and salt are heated in a medium-sized saucepan until the butter has melted.  The mixture is then brought to a rolling boil. After the batter is cooked some so that its thickens, it is set aside to cool.  The eggs are added before putting the dough onto cookie sheets in the desired shape.  Here's a link to the recipe for the pastry:    King Arthur Flour Puff Pastry/Eclair Pastry recipe

I had some half and half that I used to make my favorite recipe of chocolate pastry cream.  It's from Mark Bittman's "How to Cook Everything" book.  YUM, very rich with half and half.

I already had ganache in the freezer.  I made it to use up some heavy whipping cream not long ago.  Waste not, want not!  :)

In shaping the eclair pastry, I tried using a 1/2 cup scoop.  However, it made an irregular sized éclair.  Therefore, I thought I would pipe them.  Why not use my cake tools to make the job easier?


However, I didn't know how to make them thick enough. I think that next time I'll get a bigger icing tip if I do it this way.  There was a lot of batter leftover, after piping the 12 for the recipe.  I didn't really want to make more than 12, so I went back and added more of the thick batter.  They came out quite "bumpy," because the batter was too thick to mingle with the rest of the dough on the baking sheet.


Then I found this video on making ladyfingers.  In the video, she shows how to pipe them the same size.  She has some really great tip on how to make a template.  This method can be used for many shapes of pastries, even eclairs!

Check out the AWESOME tip for preventing the batter from coming out of the pastry bag while you are filling it (at about 2 1/2 minutes):


After seeing this video, I had one of those "I coulda had a V8 moment!"  I just received a wonderful Hostess Twinkie pan as a gift from my wonderful cake buddy.  I wanted one to make "shark cupcakes."  It would have been perfect for making small eclairs!!!

I'll be using this pan to make many types of cookies and pastries, not just Twinkies, in the future!  Tiramisu anyone?

Meanwhile, we will just enjoy these awesome eclairs!  You may notice that I didn't put the eclairs on a rack to pour on the chocolate.  I didn't want to lose any yummy chocolate!!!


If you want to know more about the Avid Bakers Challenge, check out this website.Avid Bakers Challenge

Thanks for stopping by. I hope you get a chance to try making these yummy eclairs.

Wednesday, November 26, 2014

How to Make Wilton's Buttercream Zinnias and Daisys

I completed the first Wilton Method cake decorating class--Building Buttercream Skills.  I really enjoyed it, but found it VERY challenging.  The course is 4 classes; each class is 2 hours.  They pack a ton into each class. 

The teacher showed us how to do each flower.  I had never iced a cake before this course, much less try to make a flower.  I found myself wishing she could review the flowers of the previous class, so we could have a second look at making the flower.  I didn't see anything on the web, showing how to make the zinnia--it was a new flower for the newly updated Course 1.

In desperation, I contacted my teacher a month later.  She helped me out, and I am very grateful.  To make sure I didn't forget how to do these flowers, I made these videos for zinnia and their daisy shape:


Here is the video for the daisy.  There are several ways to shape a daisy--with a rose tip, or with a #12 tip.  Here is the one we learned in class:


I hope this will help you in your cake decorating, also!  Practice, practice, practice!  Buttercream flowers are challenging.  You have to monitor icing consistency, how you point the tip, and turn the flower nail all at the same time.

All the best,

Judy


Wednesday, October 8, 2014

Cinnamon-Apple Twist Bread

This month's Avid Baker's Challenge is the Cinnamon Apple Twist Bread by King Arthur Flour.
A great time for cinnamon apple bread!

A really silky dough!


Lots to set up!


Dough went into fridge overnight. 


Some of my handy gadgets--My coveted (but no longer made) Daisy electric peeler, mandolin (with grater) and box grater.  I liked the box grater better than the mandolin.


Weighing the dough before dividing for loaves


Letting the dough relax before rolling it out more.


Adding Vietnamese cinnamon and sugar mixture!


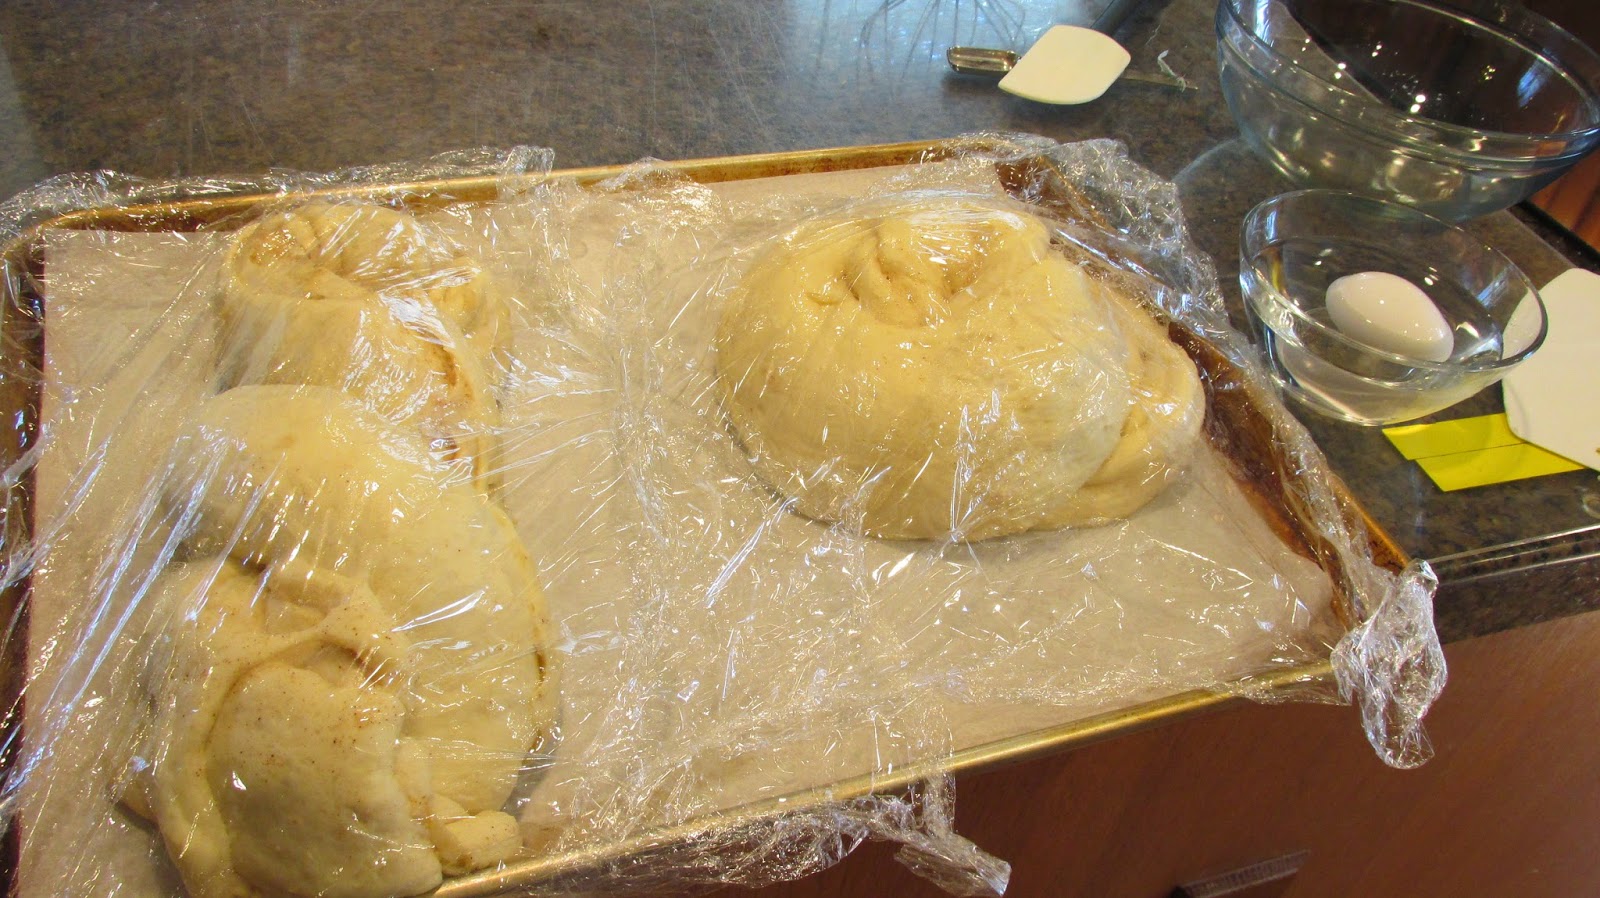
They rose nicely


YUM!!!


If you would like to make this bread, the recipe can be found here:
King Arthur Flour's recipe for Cinnamon-Apple Twist Bread

If you would like to join the Avid Baker's Challenge in our monthly challenge, click on this link:
 Avid Bakers Challenge   You will  be trying new recipes and techniques monthly.  Fun discussing them with the others in the group!


Monday, September 1, 2014

Chocolate Tarts with Almond Crust


Chocolate Tarts with Almond Crust


This month's Avid Baker's Challenge of King had me singing an old nursery rhyme while making them.:
The Queen of Hearts
She made some tarts,
All on a summer's day;          
The Knave of Hearts
He stole those tarts,
    And took them clean away. 
The King of Hearts
Called for the tarts,
    And beat the knave full sore;
The Knave of Hearts
Brought back the tarts,
    And vowed he'd steal no more.
picture of a queen of hearts playing card; the queen has a chef's hat in her crown and is carrying a tray of tarts
(my version was "the king at the knave full swore", nothing about a beating, LOL)

The month's Challenge was to make the King Arthur Flour Almond Tarts, which has an almond filling.  I thought that an almond filling and an almond crust were too much alike.  I'd rather have some variety.

I didn't want to eat all of the tarts on my own, so I wanted to make sure my hubby would enjoy them with me.  So I asked my husband if he would rather have cherry pie filling or chocolate pastry cream.  It took him a very long time to choose--these are both his favorite fillings!  He finally decided on chocolate pastry cream.

Perfect, I thought!  I had the 4 egg yolks that I needed for the pastry cream in the freezer.  They were left over from the angel food cake I made awhile back.  Good chance to see how they would fare when they defrosted.

First, I made the pastry cream.  I think Mark Bittman's recipe is the easiest.  It was posted in the NY Times.

Pastry Cream


  http://www.nytimes.com/recipes/1015881/pastry-cream.html
TOTAL TIME

Ingredients

  • 2/3 cup sugar
  • 2 tablespoons flour
  • 2 tablespoons cornstarch
  • Salt
  • 2 eggs, or 4 yolks (just what I had!)
  • 2 cups cream, half-and-half or whole milk (I used 1% milk)
  • 2 tablespoons softened unsalted butter
  • 2 teaspoons vanilla extract

Preparation

1.
Combine the sugar, flour, cornstarch and a pinch of salt in a small saucepan. In a separate bowl, mix together the eggs and cream. Over medium heat, whisk the egg mixture into the sugar mixture; whisk occasionally at first to get rid of lumps, then pretty much constantly until the mixture starts to boil and thickens, about 10 minutes.
2.
Adjust the heat so the mixture bubbles gently. The mixture is ready when it coats the back of a spoon and a line you draw with your finger through this coating holds its shape. Stir in the butter and vanilla, and strain the mixture through a fine-mesh strainer. Let cool to room temperature before using.

YIELD
2 1/2 cups

VARIATIONS

Chocolate pastry cream: Add 2 ounces chopped chocolate to the mixture as it cooks.
Coffee pastry cream: Add 1 tablespoon instant espresso or 2 shots freshly brewed espresso to the mixture as it cooks.
Boozy pastry cream: Skip the vanilla. Add 2 tablespoons Scotch, bourbon, rum or port to the finished mixture while it’s still hot.
______
I made the chocolate pastry cream version, hubby's favorite.  Hanaa, of Hanaa's Kitchen, recently said she makes pastry cream with 1% milk.  Thank you, Hanaa!!!  I saves calories and having to buy another milk variety.
I was going to strain the pastry cream (I think the defrosted egg yolks clumped a bit), but my hubby didn't want to lose a drop of  chocolate goodness!  I used 2 ounces of semi sweet chocolate chips.

Next, I made the crust:


Adding the flour and almonds makes a crumbly mixture.

I put the mix together and then put the mix in the refrigerator overnight.  I like to bake in parts.

The next morning, I decided to bake the tart crusts.  Now, there's two times I should never bake--first thing in the morning (I'm not awake enough) or when I am on the phone.  I did both of these, and there was a comedy of errors.

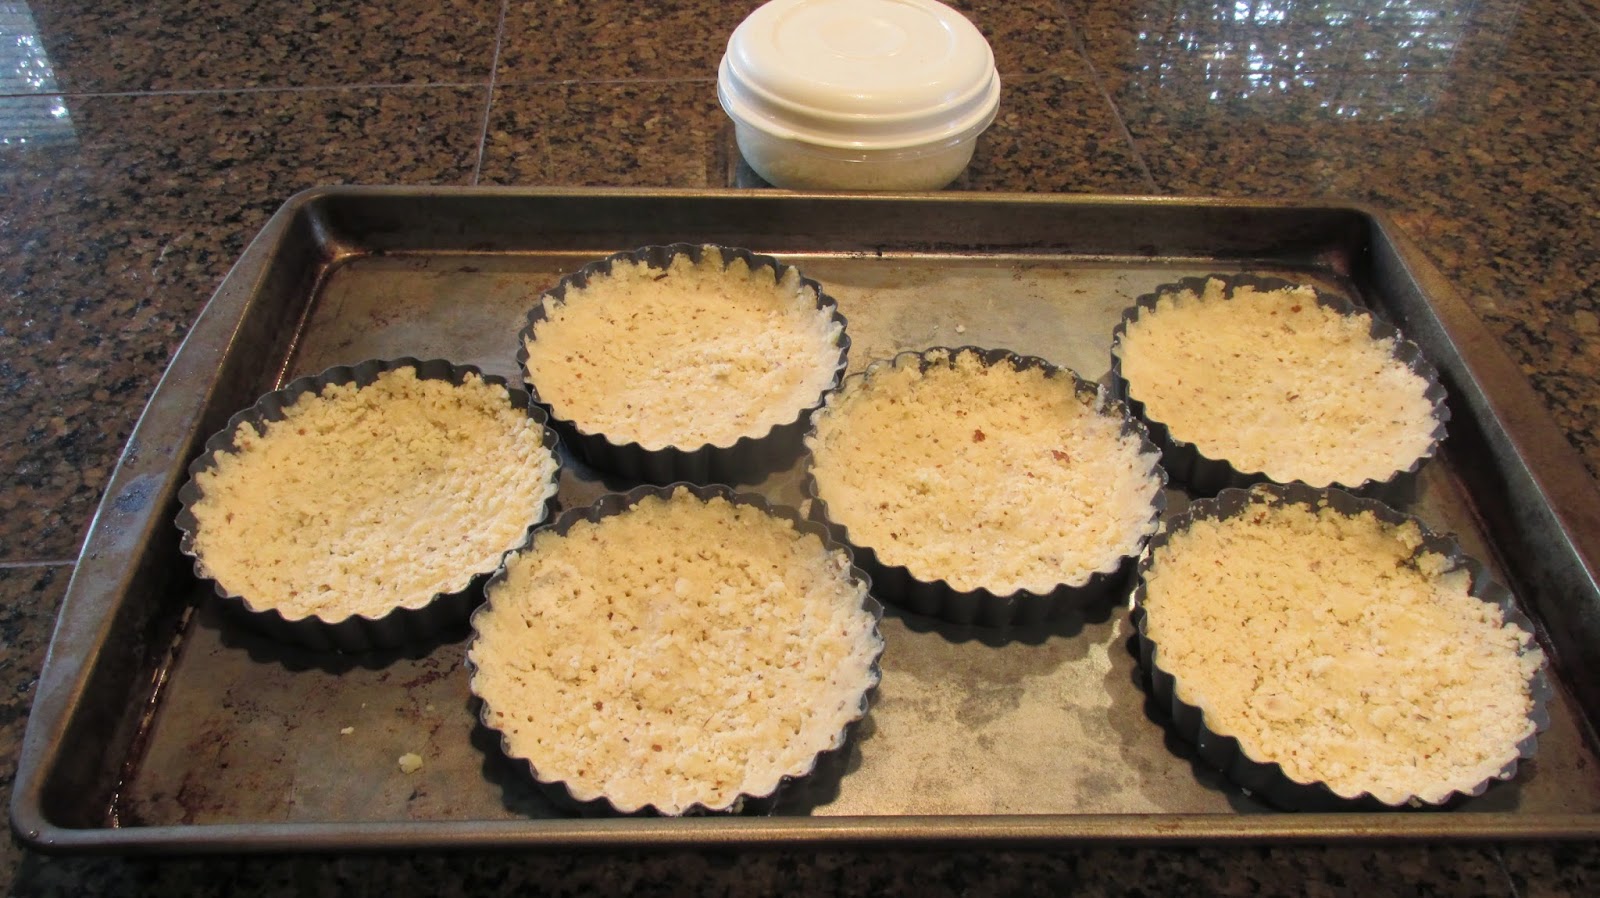
Five tart pans???

First error.  I couldn't find the 6th tart pan!  Do you see 6 tarts in the picture above?  Well, I only saw 5.  Wake up, Judy!!!  That's why there's leftover crust mixture saved in the container above--for the 6th crust.


Here are the crusts in the freezer, for the 15 minutes necessary after shaping them into the tart pans.  (And after I rescued them quickly after putting them into the oven to bake).


Defrosting the whipped topping

While the tarts finally baked, I defrosted the whipped topping.  I have a favorite brand that's not available here, so I keep it frozen.  I didn't want to waterlog the container, so I it in a ziplock bag and defrosted it in cool water.  It worked fine.  I do this with packages of frozen meats all the time to defrost them quickly.


The whipped topping whips up really nicely.  As Julia Child says, "Whip to a frenzy!"  LOL

Assembly of the tarts was pretty quick.  We really enjoyed them for dessert that night!


If you want to see the awesome versions of this recipe by the other members of the Avid Baker's Challenge, please check out Avid Baker's Challenge

If you want to see the full recipe for the Almond Tarts (with almond filling) check out King Arthur Flour Almond Tarts

Thanks so much for stopping by!

Followup:  I froze 2 crusts, and made lemon curd.  I used one crust with some of the lemon curd and whipped topping.  It was wonderful!


Judy


Thursday, August 21, 2014

"The Godfather" Spaghetti Sauce for 20 Guys


Two things happened, almost at the same time.  We watched "The Godfather."  Being a foodie, my mouth dropped when there was an Italian spaghetti sauce recipe!  I made hubby review the DVD to get the recipe for the spaghetti sauce that was taught to Michael Corleone.

Coincidentally, the tomatoes of a really nice man in my pool class got ripe.  He only gives them out when they are ripe.  I missed class, and he kindly brought me all but 2 of the tomatoes below!

So... I think I need to make a batch of the "The Godfather" Spaghetti Sauce for 20 Guys."

A Tomato Bonanza!


Clemenza makes spaghetti and meatballs in "The Godfather."     video


First, I watched a video on how to peel tomatoes.  Otherwise, the skin would come off in cooking and make a messy sauce.  Yaay for YouTube!  How to Peel a Tomato


Before putting the tomatoes, cut an "X" in the top and bottom of the tomato, to make peeling easier.  Put the tomatoes in ice water after cooking to stop the cooking of the tomato

I chopped up the peeled tomatoes with a potato masher.  Then I chopped up some garlic.

Clemenza's recipe calls for adding sausage and meatballs.  I made a change, and added vegan sausage.  Really tasty.


The sausage was sliced and sauteed in olive oil.


After the garlic and sausage were sauteed, I added the tomatoes, salt, pepper, and tomato paste.


We enjoyed two wonderful dinners.  I listened to some Italian music on YouTube, while we ate dinner.


Sunday, August 17, 2014

"Clear out the Fridge" Roasted Vegetable Focaccica


This month's Avid Baker's Challenge is the Roasted Vegetable Focaccia recipe by King Arthur Flour.  The recipe calls for a dough that uses a starter.

I call this focaccia "Clear out the Fridge"  because it uses up a lot of things I had in the fridge.  I made this recipe on a Monday, the day before we go grocery shopping so we would have room for fresh foods. 

Tuesday is senior discount day at Kroger.  They give seniors 60+ (hubby is over 60, LOL) a 5% discount on groceries.  Needless to say, there isn't a handicapped parking space available, and the store is packed!  I know a lot of people who avoid the store on Tuesdays, but we love the discount.  Since there is tax on food here, it helps to pay the sales tax.  It's actually a party atmosphere, with people running into each other.

Here's my version of the recipe:

Roasted Vegetable Focaccia


Hands-on time:
Baking time:

Yield:two quarter sheets or one large sheet of focaccia, about 8 to 10 servings

Starter


  • 1/2 cup cool water
  • 1/16 teaspoon instant yeast
  • 1 cup King Arthur Unbleached All-Purpose Flour

Dough

  • all of the starter (above)
  • 2 teaspoons instant yeast
  • 1/2 cup lukewarm lowfat milk; amount depends on humidity
  • 2 cups King Arthur Unbleached All-Purpose Flour
  • 1 1/4 teaspoons salt
  • 2 tablespoons olive oil

Topping

  • 1-2 zucchini
  • 1/2 yellow squash
  • 1/2 sweet onion
  • 1/3 cup sundried tomato, softened in 1/3 cup warm water
  • 2 Japanese eggplant (from farmers market)
  •  olive oil
  • 1-2 tsp Italian seasoning
  • 1/2 seeded jalapeno
  • grated Parmesan cheese
  • kosher salt
  • garlic


Recent purchase from farmer's market.  The leftover was used as foccaccia toppings.

Japanese eggplant is much milder than regular eggplant.  Also, it is much easier to slice!  You slice it just like you would zucchini.  In fact, I was quoted in the Charlotte WFAE blog on how easy it is to use it.  http://wfae.org/post/trouble-eggplant .

Quarter sheet pans--half the size of my baking sheet!

I got 2 quarter sheet pans over a year ago.  I had planned to use them for making holiday fudge.  Unfortunately, I broke my ankle and didn't do any holiday baking.

I thought focaccia would be a great way to use the pans.  Instead of making one big one, I could make two smaller ones and freeze one!  My hubby is on soft foods due to dental surgery, so I would freeze one for when he could enjoy it.

I made the focaccia over 2 days, because the starter needed 14 hours before adding it to the dough.  It would have been a lot easier if I had done it over 3 days.
Making the starter, late afternoon

Nice rise.  I think this was the starter

The focaccia, shaped and ready to rise.  It's getting late for dinner, though.  I put them in the oven, with the light on, to hasten the rise.


Out of the oven!  Time for dinner!!!

I put vegetable oil on the pans, instead of spray, because I didn't want them to stain!

I enjoyed the first pan, although I baked it a little long.  It was crispy.  Still, it was delicous!


Be sure to check out the full recipe, and directions, on the King Arthur Flour Site:
http://www.kingarthurflour.com/recipes/roasted-vegetable-focaccia-recipe

and enjoy the other focaccia postings from the Avid Baker's Challenge at http://avidbakerschallenge.blogspot.com/

Thanks for stopping by!

Judy