Monday, December 13, 2010

100% Whole Wheat Christmas Stollen and King Arthur Baking Kit


100% Whole Wheat Christmas Stollen
Stollen?  What's that?  Well, this is my introduction to a Christmas Bread that my HB5 group is baking now.  According to Guff at Guff's Healthy Bread In 5 Challenge , "Stollen is a rich German sweet bread containing nuts, dried fruit, and such--it gets its name from Stollen, a wooden post or prop; so called from its shape."  Thanks, Guff, for this wonderful explanation!

Every year I make a special bread for my friend's Christmas dinner.  The last 2 years, I've made Swedish Cardomom Wreath.  When I told her about this stollen recipe, she wanted to try it this year.


A mixture of cherries, cranberries, blueberries and raisins seemed flavorful.  I began by soaking the fruit in a mixture of brandy and water, after chopping it in my mini food chopper. Not sure how much of either, just enough to cover the rinsed fruit.
Soaking the dried fruit in brandy!
Well, now that the dried fruit is soaking, I can't do anything to make the stollen for awhile.

I guess I could open my package from King Arthur....  I was the really lucky winner of Zoe Francois'  and Jeff Hertzberg's King Arthur Baking Kit giveaway. Zoe and Jeff are the famous authors of "Artisan Bread in Five Minutes a Day" and "Healthy Breads in Five Minutes a Day." Check out their wonderful website at Artisan Bread in Five Minutes a Day
I've learned so much from their step by step posts and great videos!
 
I won the giveaway, but I almost didn't win!  I got an email from Zoe on Thanksgiving day, and almost deleted it.  I couldn't believe I would ever get an email from Zoe.  THE Zoe! (Can you say "starstruck?").   :)


I'm going to use the kit in making this stollen, so you can see how great it is. The kit includes a square 6-quart acrylic storage container; the great book Artisan Bread in 5 Minutes a Day, King Arthur dough whisk; a 2-pound bag of King Arthur organic all-purpose flour; and an instant-read thermometer to test your loaf when it’s done.   I think it's a great gift; you can find it at King Arthur No Knead Bread Gift Kit

The dough bucket looks really neat and compact.  I wonder how it compares to the round dough bucket I've been using?

round vs. square?

Well, it turns out they are about the same height.  But that square size will fit in my fridge better, and fits really nicely on my scale.I found that there's a tradeoff with the square dough bucket.  It's a bit tricky to get the flour out of the corners.  With practice, I bet I'll find a trick!


This temperature probe is great!  The cover doubles as an extended handle!  It's flat and will pack well when I travel.  
I bake at the homes of friends, to give them the gift of freshly baked breads.  They love that wonderful smell of baking in their home! 


Ok, all my ingredients are laid out.  I'm ready to put the stollen dough together!  I'm going to use my King Arthur White Whole Wheat flour for this recipe.  I'll make something later with the cute package of organic unbleached flour they sent me.


Here's a tip I would like to share.  I'm making a half batch of stollen.  I've gotten the amount in ingredients for a half batch mixed up in the past.  Now I write the weights for a full batch to the left of the ingredients, and a half batch to the right.

I'm making a change in the recipe.  My friend said she would love brandy in the stollen.  So I am not cutting the amount of brandy in half for a half batch.  Also, I am draining the dried fruit and using that fruit/water/brandy mixture as part of my water.  Otherwise, I followed the recipe as listed in the HB5 book.  

Ok, it's time to put the dough in the fridge overnight.   

Yep, I really like the way this container fits in my fridge!

The next morning, I braved the very cold garage and took the dough out of the refrigerator.  It had a nice color to it:  


Let's shape the loaves.  I measured out the suggested 1 1/2 pounds of dough for a stollen loaf.  There was also enough dough for 2 mini loaves (Stollenettes??), about 8 oz. each.  
"Let's Do the Gluten Cloak, Again!"
After doing the gluten cloak, I'm covering them with a flour sack towel to rest.  That way, they are easier to roll out.  Meanwhile, why don't we watch a HB5 video, where Jeff and Zoe introduce "Healthy Breads in 5 Minutes," and Zoe shapes stollen.  It might give us some shaping tips!:

  
I decided to use a combination of almond paste and toasted almonds:

Time for a short nap
The loaves are put aside to rest, rise and shine later!  I have purchased a number of these timers from the dollar store.  Each pan can have its own timer.

The loaves get an egg wash and are put in my oven for baking.  I used the convection setting, to make baking easier.  Don't they look yummy?

They cooled, and then I put 2 loaves in the freezer for later.  My friend wouldn't be by for a few days.  I put powdered sugar on one of the "stollenettes" so we could taste it.  Really yummmy.  My hubby said it would taste fabulous with jam, too.

Thanks for stopping by and checking out my version of this HB5 challenge.  I hope you will leave a comment below.  I learn so much from baking friends!

And thanks so much to Zoe Francois, Jeff Hertzberg and King Arthur Flour.  You guys are awesome!


Judy

Sunday, November 28, 2010

Baking at My Friends' House, Without Any of My Equipment!

Recently, I stayed at the home of good friends, while making a trip back to Los Angeles.  I also stayed with them about 6 months ago, and asked if I could use their kitchen then.  Baking relieves stress for me and gives me the feeling of doing something special for friends. I was happy that they enjoyed what I did so much!


This time, one of the daughters quickly requested "Can you make some of that chocolate chip challah again?"  Loving the fact that she liked it so much, I put that on my list!  Everyone seems to love what I bake or cook, and I love an appreciative audience!

Baking in their kitchen calls for creativity on my part.  I have to figure out what's available, and "make do."  I brought my Weight Watcher food scale (this one only goes up to 2 pounds) on trips. 

However, I didn't have dough buckets, oven thermometer, digital thermometer, multiple baking sheets, dutch oven, tea towels, or a good set of measuring spoons/cups.  Ok, there are measuring spoons, but the writing rubbed off--I guessed which one is a teaspoon.  Next time, I might write the measurement with a Sharpie.

Their refrigerator space is at a premium, and we quickly loaded it up with goodies for the week.

But it was so much fun! 

I started off by making raisin challah.  In the AB in 5 book, the recipe says to roll out the dough, sprinkle with raisins , roll the dough into a log....


Handwise tip--A faster way is to add the raisins to the flour when making the dough.  The raisins become coated with the flour and mix into the dough evenly.


A half batch of challah raisin dough was made.  A large stockpot was used for mixing the dough and storing it in the refrigerator.  It was a real juggling act to find room in the refrigerator for such a large pot!


The next morning, I quickly made the braid, added egg wash, and sprinkled sugar on top.  Because I'm used to the Eastern Time Zone, I was awake and in the kitchen long before anyone else was awake. They are used to Pacific Time Zone, so I had plenty of time. They woke up to freshly baked bread!


Raisin challah


Since their daughter wanted something with chocolate chips, I decided next to make glazed rolls especially for her.  In the AB5 book, the recipe says to roll out the dough, sprinkle with chips and sugar, and roll the dough into a log.  I did that, and then cut off 2 inch slices of dough for the rolls.  They were baked in a 9 inch cake pan.


After the rolls were cooled, I made a confectioner's sugar glaze for the rolls.  I've used more confectioner's sugar in the past few years than I've ever used before (I moved to the South!).


Chocolate Chip Glazed Rolls
As mentioned before, refrigerator space is at a premium at this house.  So I decided that my next bread with be the Jim Lahey Walnut and Raisin Bread--no fridge space needed.  This is one of my favorite breads, and I'm glad I brought the recipe.


This dough mixed quickly, and sat on the counter overnight.  No refrigeration, just time, is needed

My friend didn't have the 5qt dutch oven that is recommended for this bread.  She had some shiny-new pyrex casseroles, which were about 3qt.  I took a risk that I could divide up the dough and make 2 loaves from each batch.


This is tricky because the recipe calls for the wet dough to be plopped onto a tea towel for the last rise.  There weren't any tea towels.  I had one "sort of tea towel" and one cotton placemat.  Hey, it worked out!


I wasn't sure the pyrex would hold up in a 450 degree oven, so I began by baking the first loaves longer at 400 degrees.  The pyrex were so new looking, I was afraid to use them in a hot oven.


Jim Lahey's Walnut & Raisin Bread


The loaves were just great, even without the digital thermometer to test if they were done.  In fact, baking this way may have answered why my loaves were damp in my dutch oven at home.  It's possible that my 3.5qt dutch oven is too small for a full batch.  There's plenty of room, but Jim Lahey recommends a 4.5 to 5 qt size.  Maybe it needs room to steam?

I also brought sourdough baguettes from home:

100% Wild Yeast Sourdough Bread
They were part of a dinner consisting of Mexican Lasagne (layers of tortillas, corn, refried beans, salsa, and olives), salad, and Spanish rice.  It was fun sitting down for a meal with my friends.

By the way, my friend says that the "magic eraser" removed any stains from the bread baking.  But it also erased the memories... 

I'm including a video of my favorite baking buddy while baking in their home.  Molly never left my side while in the kitchen. What an optimist, since I never dropped any crumbs! We had to shoo her away from the hot oven.  She's still a puppy and kept sniffing at the oven door when I opened it.


We had a great time, and I have been invited back again.  Yaay!  

Only, next time, I am putting together a "baker's travel kit!"  I'll take one of those small roll-type toiletry bags, and add various baking items--small scale, measuring spoons, flat digital baking thermometer, tea towels, and any special ingredients.  I'm not sure about measuring cups, because they aren't very flat.

What would you put in a travel baking/cooking kit?  This may be a good topic for discussion, and I hope you will leave a comment including that below.

Thanks for stopping by, and visit with me again soon!

Judy

Monday, November 1, 2010

European Peasant Bread

European Peasant Bread Baked in a Dutch Oven


I'm just "lovin' bakin' in my dutch oven."  So, instead of the assigned HB5 breads, I thought I'd make another dutch oven bread this week.  I could make another Jim Lahey bread, but how about one of the "Artisan Breads in 5 Minutes" breads?  


There are still a number of  AB5 breads that I haven't tried.  This would be a good time to try the European Peasant Bread, with the twist of doing it in a covered casserole.

I made a half batch of the dough, with a few changes:
  • Used white whole wheat flour
  • Added 1/4 cup vital wheat gluten, due to all the rye and whole wheat flours used
  • It rose in a small (Dollar Store) basket, to simulate a brotform.
  • I sifted the dry ingredients.  Michelle introduced me to a  battery operated sifter, and it's great! 
Norpro Battery Operated Sifter
At first, I thought I'd do a one pound loaf.  However, since I wanted the bread to rise in a basket, I decided to use the two pounds of dough.  Not too small, not too big, just right!


The basket was sprayed and floured before adding the dough, to keep the dough from sticking.  I put the basket into a plastic bag and it was placed into the warmed microwave to rise.  I'm not sure how long I let the dough rise--just until the dough filled the basket nicely.  Meanwhile, the dutch oven heated in a 450 degree oven.


After the dutch oven heated for about 30 minutes, I removed it with my favorite Ove-Gloves mitts.  The dough plopped into the pot when I turned the basket of dough over.  Shaking the pot slightly helped shape the bread better in the pot.  I could see the straw basket pattern in the dough!  I was nervous about slashing the dough in such a hot pot, so that wasn't done.


Here's a picture of the bread, when I took the lid off.  The bread baked, uncovered, for about 20 minutes more.


Since I've had breads with damp centers in the past, I made sure to use my digital thermometer in the center of the bread. The first time, the temperature went up slowly to 205 degrees.  After ten more minutes in the oven, the temperature went up to 205 degrees rapidly.  My instincts told me that the bread was ready to come out of the oven.


This is a picture of the finished European Peasant Bread. You can see some of the pattern of the basket on the bread.

The texture of this bread was really good.  I know I baked it longer to make sure I didn't get a wet center, but I wonder if the sifting helped.  It might help, since the vital wheat gluten is mixed throughout. 


Yummy, yummy bread!   The center was not damp, either!  Glad I listened to my instincts.

It reminded us of the deli rye bread, but without the caraway seeds.  Next time, I might add the seeds. We ate the bread for dinner with orange chicken and millet pilaf on Friday night.  There was only a little left by the time Sunday rolled around (a sign of a good bread in my house), but it was just enough for salami sandwiches--a quick Sunday dinner.

Thanks for stopping by to visit! Come back soon, I'll be baking again often. I hope you will leave a comment below. I read every comment, and really appreciate your feedback.

Thursday, October 14, 2010

Jim Lahey's Walnut Raisin Bread

Pan co' Santi--Walnut Bread
I seem to be baking my way through Jim Lahey's book,  "My Bread, The Revolutionary No-Work, No-Knead Method."  This book is so popular, it's surprising that there isn't a group baking their way through it.  Maybe a group should be started?

This recipe caught my eye because of the raisin and walnut combination. Also, it's a wonderfully rustic-looking loaf! It reminded me of his similar olive loaf, which was recently baked.

The dough was quickly put together after dinner one evening, with the intent to bake it the next morning.  The dough is supposed to rise until it's more than doubled in size--about 12 to 18 hours.  It actually rose longer than that, because of errands that needed to be done in the morning.  This is a very forgiving dough.

The dough was placed on a tea towel to rise for 1 - 2 hours, before it was placed in my heated 3.5 quart Tramontina dutch oven.  Jim Lahey recommends that people use a 4 1/2 to 5 1/2 quart pot.  However, that would be too heavy for me.  This pot has been used before, and the bread conformed to the size of the pot.  Recently, I replaced the plastic knob with the Le Creuset stainless steel knob so that the knob could withstand higher temperatures.

The dutch oven was put in the 475 degree oven for 30 minutes, per the recipe.  After that, the lid was removed so the bread could bake 15-30 minutes more.  

After 15 minutes, the bread was checked with a digital thermometer.  It registered over 200 degrees, so the bread was removed from the pot and put on a cooling rack.  

We cut the bread several hours later, when the bread was cool.  I was dissappointed to find that the bread seemed quite cool and damp in the center.  Even though the bread registered done on the digital thermometer, it could have benefitted by baking it longer.

Possibly, using a smaller pot could have impacted the bread. If I remember correctly, the olive bread, made some time back, seems to have had the same problem.  Therefore,  my next Lahey bread will cook a bit longer covered and uncovered next time.

This was a marvelous loaf--we ate it over the weekend.  The low amount of yeast, and the long rise times, really brought out the flavors of the grain, walnuts, and raisins.  It was great plain, with sweet butter, or cream cheese.  It will be interesting to experiment with longer bake times next time.  Possibly, that will help the center cook more completely. 

Thanks for stopping by to visit! Come back soon, I'll be baking again often. I hope you will leave a comment below. I read every comment, and really appreciate your feedback.

Whole Grain Garlic Studded Baguette, Whole Grain Pizza on the Grille

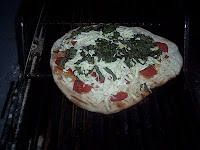
Whole Grain Margherita Pizza

Garlic-Studded Baguettes


For my "Healthy Breads in 5 Minutes a Day" baking group, I felt it was finally time to conquer my fears of making pizza on the grill.  Also, I decided to make my favorite baguettes with a different dough.

We had a choice of several whole grain doughs.  My choice was to try the Whole Wheat with Olive Oil dough again.  The first time I made this dough, it seemed to be a bit loose.  There's now a post-it note on my recipe that reads, "good for flatbreads."  Now that I have more experience, I've begun to adjust these recipes more.  Michelle, our host, is probably smiling about that!


White Whole Wheat flour was used, and slightly less water--about 1/4 cup less.  Using less water seemed to help this time.  The dough seemed firmer.  After the dough rose and was chilled overnight, it was time to bake!  Yaay!!!


Whole Grain Grilled Pizzas
It was time to brave the grill!  I've been  nervous about grilling pizzas.  There's the thought of the dough falling through the grates.  Also, it's my hubby who usually does the grilling, so I don't have much experience in this. He didn't want to do the pizzas.  Lastly, it's close to fire!  Need I say more?

For my first try, I used flour under the dough on the peel.  Lots of flour!  The pizza ended up with a "too much flour" taste.  Next time, I think I'll flour my peel by rubbing flour all over it--not dumping it on top. 

Getting the dough onto the grill was the toughest part.  We have a split grill.  It's great for small amounts of grilling.  You can fire up half the grill for two people, or use both sides for more people.  The problem for this type of grill is that the peel is too big for one side and there's not much "wiggle room."  

The pizza slid into a bunched up mass on the grill, with the side caught off the grill.  Quickly, I nervously straightened out the pizza.  Possibly I can find a smaller peel for the future.

The dough was turned over when it began to bubble up, and olive oil was added.  Then the tomatoes and cheese were added.  We used "Follow Your Heart Vegan Gourmet" cheese.  Closing the lid for a few minutes helped the cheese melt some.
 

The sliced basil was added just before removing the pizza.

A little Wiki research--This is very similar Pizza Margherita, which was made in honor of the Queen consort of Italy--Margherita of Savoy.  The pizza toppings are fresh sliced tomatoes (well, I used canned diced), fresh sliced Mozzarella, and fresh basil leaves. It represents the colors of the Italian flag. It is believed to be the first pizza to use cheese--the pizzas we all know and love today.

There was about 1 1/2 pounds of dough left.  That would be enough for two smaller pizzas.  We decided to give the grilled pizzas another try.  I decided to test out the suggestions of several people in our group.  

Debbie felt that cornmeal works better than flour for sliding the pizzas from the peel.  

Guff and Joanna both felt that flipping the pizza onto the grill worked well. Guff felt that putting the pizza on parchment paper, flipping it so that the paper was on top, and then peeling it off partway through the cooking worked well.

Gwen, from our HBin5 group, agreed that using parchment paper gives good results in grilling.

Joanna mentioned a youtube video of Alton Brown's "Good Eats" show, where he flips the pizza onto the grill.   I am including it here, because there are a lot of great tips--flouring the peel (not overflouring it!), cooking tomatoes, and rolling out the dough.


Also, in this video, Alton Brown shows how to grill a flatbread over a gas burner!  This is wonderful for people who live in an apartment building or otherwise can't do outdoor grilling! He said it would even work for people living in a 5th floor walkup apartment in New York, as long as they have a gas stove.


The experiment--using cornmeal to slid one pizza onto the grill, and putting trimmed parchment paper under the other pizza.  The fire was kept medium low.


The crust that had cornmeal under it on the peel had the same problems as the one with the flour.  I shook the pizza to try to move it to the grill, and it bunched up into a mass over the fire.  Quickly, I moved it back into a larger piece.  But it lost its round shape; it's the one on the plate.


The pizza on the grill is the one that had parchment under it.  It moved easily to the grill, kept its shape, and cooked nicely.  We watched the pizzas carefully.  However, I'll try Guff's method of flipping the pizza crust so that the parchment is on top next time.  That may enable us to use higher heat.

We ate the pizza cooked on the parchment paper that night.  It was wonderful, served with fast totellini soup.


 Baguettes
I've made the garlic-studded baguettes before, and love the garlic-infused flavor from this method. This time, I decided to try omitting the stone or steam.  What would happen?  


letterfold technique
Twelve ounces (a bit larger than recommended) were used.  The baguettes were shaped using the letterfold 
technique, before stretching into a longer baguette.  Whenever there was resistance, I let the dough rest for a few minutes (so the dough wouldn't be so cranky!). 

The baguettes were place on my Silpat, on top of a baking sheet.  They were baked after baking a different bread, and the temperature was about 375 degrees.   After approximately 15 minutes, the breads were taken off the baking sheet and put onto the oven racks to firm up the bottoms.
Soft Crust Garlic-Studded Baguettes
These baguettes were wonderful  with tortellini soup.  I might continue making them this way, and you might want to try it.  For me, baking without adding the hot water and stone is a bit simpler.  Also, it takes less time and energy to heat the oven to a cooler temperature.

Grissini
I had some gluten free olive oil dough in the freezer. It was in the freezer for awhile, but looked fine. I figured it was good for flatbread. What did I have to lose by trying grissini and flatbread with that?!
I rolled 1/2 pound of dough out on parchment on a baking sheet, cut it into a rectangle (re-using the scraps) and drizzled olive oil on top.  The toppings were kosher salt and some leftover spicy spice mix from baking crackers some months back.  Then I cut the dough into strips; I made several groups of strips.  Then it was time to put the grissini in the oven to bake. Halfway thru baking, I took the pan out, separated the strips, (easy) and finished baking them. Easy, and yummy! A lot easier than moving the strips onto a baking sheet.  Crisp, too.


Sorry there aren't any pictures of the spicy grissini, but they went really fast!  So did the 2 pieces of spicy gluten free flatbreads...


Wherever, you are, I hope you are enjoying the beautiful fall colors.  As a former Southern California gal, seeing leaves change colors is new to me.  We just took a drive on the Blue Ridge Parkway to see the beautiful bright red, orange, and yellow leaf colors on the trees.  We were able to see the leaf colors at their peak!  I thought you would enjoy seeing a few of the pictures:

Grandfather Mountain, NC, from the Blue Ridge Parkway
Yours Truly, enjoying the Fall Colors
Grandfather Mountain has a mile-high swinging/suspension bridge which gives breathtaking views. 
Blue Ridge Parkway, Central Section, Moses Cone Memorial Park 

Handwise tips:  If you have hand pain, tendonitis, or arthritis or any other pain issues and want to make this recipe:  
  • My tip for this post is for the pizzas. By cooking two pizzas, we were able to freeze one pizza and eat one for dinner (cook once, eat twice!). 
This bread is one of the breads from the "Healthy Breads in 5 Minutes a Day" book.
The HBinFive Baking Group, started by Michelle of Big Black Dogs, is baking through all of the breads in this book.  To see what Guff, Debbie, Gwen, Joanne, Michelle, and my other HB5 baking buddies have made recently, check out The 21st HBinfive Bread Braid

Thanks for stopping by to visit! Come back soon, I'll be baking again often. I hope you will leave a comment below. I read every comment, and really appreciate your feedback. 

Monday, October 4, 2010

Pear Tarte Tatin, Apple Strudel Bread and Cranberry Pecan Sweet Rolls

For this braid, our baking group was able to pick between 2 doughs--whole wheat brioche, and pumpkin pie brioche.  Since we made pumpkin pie brioche before, I tried the whole wheat brioche.  What a wonderful dough--so nice and silky!  A joy to use, and didn't have a strong whole wheat taste.

This dough was made in my Kitchenaid mixer.  The liquid ingredients were placed in the bowl first.  The yeast, salt and vital wheat gluten were then sifted into some of the flour with my new battery operated sifter*** (see Handwise tips).  Jeff and Zoe posted to me that it would be ok to sift these ingredients with part of the flour. That should keep the vital wheat gluten from getting gummy.  They said to just be sure to mix everything well afterwards.


 Pear Tarte Tatin


This recipe was made with my dinner guests in mind, who love ginger and cardamom.  My hubby experienced too much ginger in one of my recipes, and now won't touch it.  Bosc pears were used, one of my favorite fall fruits!

The dough was made the night before, so it was time to make cook the pears.  Peeling the pears with my Dazey Stripper didn't work.
Will someone start making these again???

That was unusual.  This gadget is great for peeling apples or potatoes.  Now I only see the peeler (without the necessary blades!) on ebay.  The pears just seemed a bit too soft. 


So, the pears were peeled, cored, and sliced with my trusty paring knife.  We don't have a cast iron pan, so the pears were sauteed in our 11" Kitchenaid pan. 

The dough was rolled out to about 12".  To make the transfer easier, a pie-making trick was used.  I folded the dough in half, then in half again.  The corner of the dough was placed onto the center of the pan.  It was then simple to unfold the dough onto the pears.  


Because I was using a larger pan, I made really sure to tuck the dough underneath the pears:   


After baking it for about 20 minutes, the pear tarte tatin looked like this:


Five minutes later, I placed a serving tray on top and flipped (in what a guest called "an act of faith) the tarte onto the serving tray.

The pears needed a bit of readjustment, but it was just great that the tarte came out in one piece onto the platter!!!

Apple Strudel Bread

Yummy, yummy, yummy!  This bread is one of my definite favorites.  Instead of making doughnuts, I thought I would make this bread again.  However, this bread was made after an eventful day of cooking and entertaining guests.  Baking that day was my therapy, and I wasn't up for challenges.  Although the taste was fabulous, you'll see that it wasn't the "desired" shape.

Two pounds of dough were rolled out.  The filling of apples, cinnamon, raw sugar and walnuts was added.  There was my note on the recipe, from last time, to decrease the amount of raisins and walnuts--which I did.  

However, I couldn't tell whether my note about the apples was to use 2 or 3 medium apples.  Therefore, I decided to use one medium and one large apple.  That may have been my downfall in this recipe....

Before rising!
After rolling the dough into a long log, it was really too big to place into my prepared 8 1/2" x  4 1/2" loaf pan.  I was just too tired to dig up a larger loaf pan, spray it with oil and wash my current pan.  That's when I decided to fold the log in half and put it into the current loaf pan:  

There were holes in the dough, after the transfer.  They were patched with dough scraps, just as if it were a pie.  Halfway through the baking, I checked on the progress:   
  
Uh Oh!!!!

The long log should have been baked on a baking sheet.  Not only did the loaf bake over the sides, the dough scraps were falling off  (they were yummy!).  Thankfully, I put a piece of foil underneath the loaf pan.  At least I was alert enough to think of that....

Top of Apple Strudel Bread

Bottom of Apple Strudel Bread
As mentioned before, the final loaf wasn't pretty, but it was really tasty.  I ate this quickly, and I'm not sure my hubby got to taste it!  YUM!!!
  Cranberry Pecan Sweet Rolls

The last assignment for this braid was the Honey Caramel Sticky Buns.  I had made this before, and have vivid memories of the oven fire--Honey Caramel Sticky Buns and a "kitchen adventure."


Therefore, I decided to make simple sweet rolls.  Craisins sounded good.  The dough was rolled out, and the craisins were sprinkled onto the rectangle of dough.  When the dough was almost rolled up into a log, I thought "what about some sugar?"  So the dough was unrolled slightly, and some sugar was sprinkled onto the rectangle.
"Baking by Inspiration"


The log was cut into 2" slices which were placed on their sides.  There were some chopped pecans in the cabinet, so those were sprinkled on top.  After the baked rolls were cooled, a simple icing was drizzled on top:


These were shared with our happy crew of gardeners, our great neighbor (across the street), and my yoga teacher.  My hubby snacked on these also.  Well, at least he ate one out of the three recipes!


Handwise tips:  If you have hand pain, tendonitis, or arthritis or any other pain issues and want to make this recipe:  

  • The Handwise tip for this recipe comes from our HBin5 host--Michelle, of Big Black Dogs.  There seem to be 2 kinds of sifters, usually.  One is the squeeze handle, which can be very tiring on hands.  The other is a turn handle, which can also be tiring.  Michelle told me about her Norpro battery operated sifter:       
Battery Operated Sifter
At first glance, it was dissappointing that the sifter could only hold 4 cups.  However, it's just wonderful that it does all the sifting by itself--no handles to squeeze or turn. 
I will mention two aspects about this sifter:
  1. Make sure you put the handle in place properly, or it won't work well.  The flour will sift slowly.
  2. This may not be a good sifter if your hands are sensitive to vibration.  However, the sifting only lasts a short time.
This bread is one of the breads from the "Healthy Breads in 5 Minutes a Day" book.The HBinFive Baking Group, started by Michelle of Big Black Dogs, is baking through all of the breads in this book.  To see what my HB5 baking buddies have made recently, check out The 20th HBinfive Bread Braid

Thanks for stopping by to visit! Come back soon, I'll be baking again often. I hope you will leave a comment below. I read every comment, and really appreciate your feedback. 

Judy

IL BOLO, Italian bread with olive oil, anise, & honey and Apricot Noodle Pudding

IL BOLO


Our calendar for the HBin5 baking group said that this bread would be baked in a year.  Frankly, I don't always have that kind of patience!  Especially for a enriched bread having ingredients like this--honey, olive oil, vanilla, lemon zest, and anise seeds.  My curiosity was aroused!

I put together the dough one morning, and went to run some errands at 9:30 a.m. while the dough was rising.  I guess I really got into getting those errands done.  I didn't get home until 3:30, with the thought that the dough would be ok.  What could possibly happen?  


This is what I found when I came in the door:         


It was another one of my baking adventures, greeting me at the door!  I quickly scooped up the overflowing dough, and began shaping the loaves.  I told myself "any problems with the egg dough sitting on the counter over 2 hours will bake out at high temps..."  :)


The loaves were baked at 350 degrees for about 25 minutes, not the 35 minutes stated in the recipe. They were done at that time.


This bread was fabulous!  I brought it to a large dinner get together, and people really loved it.  The bread was soft, had a beautiful crust and tasted sweet.  The caterer is a cooking buddy, who kept nibbling at it also.  


I've been doing a lot of cooking lately, for our harvest festival.  Noodle pudding (kugel) is popular this time of year, and I would like to share one of our favorites:

Apricot Noodle Pudding
12oz.         wide noodles (one bag)
1/2cup       margarine
6                eggs
8oz.            sour cream (light)
16oz.          lowfat cottage cheese
1/2cup        sugar
1/4cup        milk (could use lowfat)
1/2cup        golden raisins  (dark raisins ok, too)
8oz.            dried apricots, cut up


Topping:
1 cup          corn flakes, crushed
1 cup          brown sugar
4oz.            margarine, softened


Directions:
Cook noodles until tender.  Drain.  Place in large pot or bowl and add 1/2cup margarine; set aside (margarine will melt).

Beat eggs; add sour cream, cottage cheese, sugar and milk.  Mix.   Add dry fruit, combine with noodles.  Pour into 9" x 13" baking dish. 

Mix corn flakes, brown sugar and 4oz. softened margarine in medium bowl.  With spoon, sprinkle small blobs of topping over kugel batter.  

Bake at 350 degrees for 1 hour. Cut when cool.

Kugel can be eaten hot as part of the main course.  It's also good cold, and as dessert.  Kugel may be frozen and reheated.

Serves 10-12


Handwise tips:  If you have hand pain, tendonitis, or arthritis or any other pain issues and want to make this recipe:  
  • My tip for this post is for the noodle pudding.  If I know that I am going to make noodle pudding in the near future, I cook the recipe's amount of noodles the same night that we are having pasta for dinner.   We then use the same hot water to cook the wide noodles for recipes like this.  After draining the noodles, I put them in the refrigerator or freezer bags.  Since I measure out the amount of noodles to match the recipe beforehand, it's a simple recipe to assemble.  I just melt the 1/2 cup margarine for the noodles, and add in everything else.  Also, that's one less pot to wash later--always a helpful thing.
This bread is one of the breads from the "Healthy Breads in 5 Minutes a Day" book.
The HBinFive Baking Group, started by Michelle of Big Black Dogs, is baking through all of the breads in this book.  To see what my HB5 baking buddies have made recently, check out The 20th HBinfive Bread Braid

Thanks for stopping by to visit! Come back soon, I'll be baking again often. I hope you will leave a comment below. I read every comment, and really appreciate your feedback. 

Judy