Showing posts with label Jim Lahey. Show all posts

Sunday, November 28, 2010

Baking at My Friends' House, Without Any of My Equipment!

Recently, I stayed at the home of good friends, while making a trip back to Los Angeles.  I also stayed with them about 6 months ago, and asked if I could use their kitchen then.  Baking relieves stress for me and gives me the feeling of doing something special for friends. I was happy that they enjoyed what I did so much!


This time, one of the daughters quickly requested "Can you make some of that chocolate chip challah again?"  Loving the fact that she liked it so much, I put that on my list!  Everyone seems to love what I bake or cook, and I love an appreciative audience!

Baking in their kitchen calls for creativity on my part.  I have to figure out what's available, and "make do."  I brought my Weight Watcher food scale (this one only goes up to 2 pounds) on trips. 

However, I didn't have dough buckets, oven thermometer, digital thermometer, multiple baking sheets, dutch oven, tea towels, or a good set of measuring spoons/cups.  Ok, there are measuring spoons, but the writing rubbed off--I guessed which one is a teaspoon.  Next time, I might write the measurement with a Sharpie.

Their refrigerator space is at a premium, and we quickly loaded it up with goodies for the week.

But it was so much fun! 

I started off by making raisin challah.  In the AB in 5 book, the recipe says to roll out the dough, sprinkle with raisins , roll the dough into a log....


Handwise tip--A faster way is to add the raisins to the flour when making the dough.  The raisins become coated with the flour and mix into the dough evenly.


A half batch of challah raisin dough was made.  A large stockpot was used for mixing the dough and storing it in the refrigerator.  It was a real juggling act to find room in the refrigerator for such a large pot!


The next morning, I quickly made the braid, added egg wash, and sprinkled sugar on top.  Because I'm used to the Eastern Time Zone, I was awake and in the kitchen long before anyone else was awake. They are used to Pacific Time Zone, so I had plenty of time. They woke up to freshly baked bread!


Raisin challah


Since their daughter wanted something with chocolate chips, I decided next to make glazed rolls especially for her.  In the AB5 book, the recipe says to roll out the dough, sprinkle with chips and sugar, and roll the dough into a log.  I did that, and then cut off 2 inch slices of dough for the rolls.  They were baked in a 9 inch cake pan.


After the rolls were cooled, I made a confectioner's sugar glaze for the rolls.  I've used more confectioner's sugar in the past few years than I've ever used before (I moved to the South!).


Chocolate Chip Glazed Rolls
As mentioned before, refrigerator space is at a premium at this house.  So I decided that my next bread with be the Jim Lahey Walnut and Raisin Bread--no fridge space needed.  This is one of my favorite breads, and I'm glad I brought the recipe.


This dough mixed quickly, and sat on the counter overnight.  No refrigeration, just time, is needed

My friend didn't have the 5qt dutch oven that is recommended for this bread.  She had some shiny-new pyrex casseroles, which were about 3qt.  I took a risk that I could divide up the dough and make 2 loaves from each batch.


This is tricky because the recipe calls for the wet dough to be plopped onto a tea towel for the last rise.  There weren't any tea towels.  I had one "sort of tea towel" and one cotton placemat.  Hey, it worked out!


I wasn't sure the pyrex would hold up in a 450 degree oven, so I began by baking the first loaves longer at 400 degrees.  The pyrex were so new looking, I was afraid to use them in a hot oven.


Jim Lahey's Walnut & Raisin Bread


The loaves were just great, even without the digital thermometer to test if they were done.  In fact, baking this way may have answered why my loaves were damp in my dutch oven at home.  It's possible that my 3.5qt dutch oven is too small for a full batch.  There's plenty of room, but Jim Lahey recommends a 4.5 to 5 qt size.  Maybe it needs room to steam?

I also brought sourdough baguettes from home:

100% Wild Yeast Sourdough Bread
They were part of a dinner consisting of Mexican Lasagne (layers of tortillas, corn, refried beans, salsa, and olives), salad, and Spanish rice.  It was fun sitting down for a meal with my friends.

By the way, my friend says that the "magic eraser" removed any stains from the bread baking.  But it also erased the memories... 

I'm including a video of my favorite baking buddy while baking in their home.  Molly never left my side while in the kitchen. What an optimist, since I never dropped any crumbs! We had to shoo her away from the hot oven.  She's still a puppy and kept sniffing at the oven door when I opened it.


We had a great time, and I have been invited back again.  Yaay!  

Only, next time, I am putting together a "baker's travel kit!"  I'll take one of those small roll-type toiletry bags, and add various baking items--small scale, measuring spoons, flat digital baking thermometer, tea towels, and any special ingredients.  I'm not sure about measuring cups, because they aren't very flat.

What would you put in a travel baking/cooking kit?  This may be a good topic for discussion, and I hope you will leave a comment including that below.

Thanks for stopping by, and visit with me again soon!

Judy

Monday, November 1, 2010

European Peasant Bread

European Peasant Bread Baked in a Dutch Oven


I'm just "lovin' bakin' in my dutch oven."  So, instead of the assigned HB5 breads, I thought I'd make another dutch oven bread this week.  I could make another Jim Lahey bread, but how about one of the "Artisan Breads in 5 Minutes" breads?  


There are still a number of  AB5 breads that I haven't tried.  This would be a good time to try the European Peasant Bread, with the twist of doing it in a covered casserole.

I made a half batch of the dough, with a few changes:
  • Used white whole wheat flour
  • Added 1/4 cup vital wheat gluten, due to all the rye and whole wheat flours used
  • It rose in a small (Dollar Store) basket, to simulate a brotform.
  • I sifted the dry ingredients.  Michelle introduced me to a  battery operated sifter, and it's great! 
Norpro Battery Operated Sifter
At first, I thought I'd do a one pound loaf.  However, since I wanted the bread to rise in a basket, I decided to use the two pounds of dough.  Not too small, not too big, just right!


The basket was sprayed and floured before adding the dough, to keep the dough from sticking.  I put the basket into a plastic bag and it was placed into the warmed microwave to rise.  I'm not sure how long I let the dough rise--just until the dough filled the basket nicely.  Meanwhile, the dutch oven heated in a 450 degree oven.


After the dutch oven heated for about 30 minutes, I removed it with my favorite Ove-Gloves mitts.  The dough plopped into the pot when I turned the basket of dough over.  Shaking the pot slightly helped shape the bread better in the pot.  I could see the straw basket pattern in the dough!  I was nervous about slashing the dough in such a hot pot, so that wasn't done.


Here's a picture of the bread, when I took the lid off.  The bread baked, uncovered, for about 20 minutes more.


Since I've had breads with damp centers in the past, I made sure to use my digital thermometer in the center of the bread. The first time, the temperature went up slowly to 205 degrees.  After ten more minutes in the oven, the temperature went up to 205 degrees rapidly.  My instincts told me that the bread was ready to come out of the oven.


This is a picture of the finished European Peasant Bread. You can see some of the pattern of the basket on the bread.

The texture of this bread was really good.  I know I baked it longer to make sure I didn't get a wet center, but I wonder if the sifting helped.  It might help, since the vital wheat gluten is mixed throughout. 


Yummy, yummy bread!   The center was not damp, either!  Glad I listened to my instincts.

It reminded us of the deli rye bread, but without the caraway seeds.  Next time, I might add the seeds. We ate the bread for dinner with orange chicken and millet pilaf on Friday night.  There was only a little left by the time Sunday rolled around (a sign of a good bread in my house), but it was just enough for salami sandwiches--a quick Sunday dinner.

Thanks for stopping by to visit! Come back soon, I'll be baking again often. I hope you will leave a comment below. I read every comment, and really appreciate your feedback.

Thursday, October 14, 2010

Jim Lahey's Walnut Raisin Bread

Pan co' Santi--Walnut Bread
I seem to be baking my way through Jim Lahey's book,  "My Bread, The Revolutionary No-Work, No-Knead Method."  This book is so popular, it's surprising that there isn't a group baking their way through it.  Maybe a group should be started?

This recipe caught my eye because of the raisin and walnut combination. Also, it's a wonderfully rustic-looking loaf! It reminded me of his similar olive loaf, which was recently baked.

The dough was quickly put together after dinner one evening, with the intent to bake it the next morning.  The dough is supposed to rise until it's more than doubled in size--about 12 to 18 hours.  It actually rose longer than that, because of errands that needed to be done in the morning.  This is a very forgiving dough.

The dough was placed on a tea towel to rise for 1 - 2 hours, before it was placed in my heated 3.5 quart Tramontina dutch oven.  Jim Lahey recommends that people use a 4 1/2 to 5 1/2 quart pot.  However, that would be too heavy for me.  This pot has been used before, and the bread conformed to the size of the pot.  Recently, I replaced the plastic knob with the Le Creuset stainless steel knob so that the knob could withstand higher temperatures.

The dutch oven was put in the 475 degree oven for 30 minutes, per the recipe.  After that, the lid was removed so the bread could bake 15-30 minutes more.  

After 15 minutes, the bread was checked with a digital thermometer.  It registered over 200 degrees, so the bread was removed from the pot and put on a cooling rack.  

We cut the bread several hours later, when the bread was cool.  I was dissappointed to find that the bread seemed quite cool and damp in the center.  Even though the bread registered done on the digital thermometer, it could have benefitted by baking it longer.

Possibly, using a smaller pot could have impacted the bread. If I remember correctly, the olive bread, made some time back, seems to have had the same problem.  Therefore,  my next Lahey bread will cook a bit longer covered and uncovered next time.

This was a marvelous loaf--we ate it over the weekend.  The low amount of yeast, and the long rise times, really brought out the flavors of the grain, walnuts, and raisins.  It was great plain, with sweet butter, or cream cheese.  It will be interesting to experiment with longer bake times next time.  Possibly, that will help the center cook more completely. 

Thanks for stopping by to visit! Come back soon, I'll be baking again often. I hope you will leave a comment below. I read every comment, and really appreciate your feedback.

Monday, September 27, 2010

Pane all'Olive--Olive Bread

Pane all'Olive--Olive Bread


Several recipes in Jim Lahey's "My Bread" book have grabbed my attention.  Just looking at this olive bread recipe got my kalamata olive cravings going.  After a week of the cravings, this loaf just screamed "make me!"

For this bread, I used an 11.5 jar of kalamata olives.  It was just short of the amount in the recipe, but I wasn't going to go back to the store for another jar.  It was just enough, in my opinion.

Of  course, it was a very wet and easy to mix dough.     Here's a shot of the dough, after 5 hours of rising.  Notice the nice bubbles forming!


After quite a bit of research, I bought a 3.5qt Tramontina enameled cast iron dutch oven.  The 6qt size was just too heavy for me, even without the dough inside.  Mr. Lahey must be very strong, as he suggests the larger pots!  For this first use, the knob was covered in foil because it wasn't oven safe at 450 degrees.  Since then, the knob was replaced with a stainless steel knob.
The First Use of My Tramontina Enameled Cast Iron Dutch Oven!!!


The Pot, After it Was Seasoned...

Using my new enameled cast iron pot was really exciting.  I did a test where I tried to make a similar bread without a cast iron pot. Jim Lahey recipe--testing different baking methods.
The results varied when Corningware and a baking stone were used. So I was excited to try Jim Lahey's suggested method.


Although the recipe called for the bread to be baked at 500 degrees, my pot is ovensafe to 450 degrees.  My Ove Glove mits are ovensafe to 450 degrees.  Cooking at 500 degrees and manipulating a pot can have some anxiety.  So the temperature used was 450 degrees.  

The bread was just great, but it probably needs to be baked a bit longer at 450 degrees.  Although the digital thermometer registered that the bread was done, it was a bit gummy in the middle.  I'll have to make sure to take the temperature reading in the middle next time.

Definitely a "keeper" recipe, and it filled my olive craving!  I already have my eye on his walnut bread recipe....

Jim Lahey's Recipe, Pane all'Olive


 Handwise tips:  If you have hand pain, tendonitis, or arthritis or any other pain issues and want to make this recipe,
Using my Vidalia Chop Wizard
great measurements!
  1. Rather than chop the olives on a cutting board or cutting them with a scissors, I used my Vidalia Chop Wizard. I can press down on the grid of blades (see extra blade grid on top of my dough bucket) with my whole forearm and chop a nice amount of olives into the container.  Using my whole forearm gives me more strength.  The container has markings for cups, and comes apart easily.  The Chop Wizard soaks in my dough bucket, after use, for easier cleaning.     
  2. Soak all your tools in your empty dough bucket or a pan when you are finished using them.   That way, you can wash them easily later (or tomorrow!)  Give yourself the permission of time to clean up much later.

Thanks for stopping by to visit! I hope you will leave a comment below. I read every comment, and really appreciate your feedback.   And come back soon, I'll be baking again often.

Judy

Wednesday, July 28, 2010

Jim Lahey's bread--Testing Different Baking Methods

Jim Lahey's bread--Testing Different Baking Methods

Ready for the oven:  in a Casserole Dish, and Resting on a Pizza Peel

Ellen, a baking buddy, was raving about the breads she has made with Jim Lahey's method.  She says that people just gobble up her breads!

I got Jim Lahey's book, "My Bread, the Revolutionary No-Work, No-Knead Method" from the library.  We first tried the Pizza Cipolla (onion pizza) for dinner the next night, and it was fabulous.  So I decided to try his basic no-knead bread recipe.  One problem--I don't have a cast iron pot, and I really don't want to buy more pots or baking equipment.  My cupboards are really full!!!

So my kitchen went into "test kitchen mode."  I decided to make the dough, and try baking the dough different ways using current equipment--on a pizza stone, and in a covered Corningware casserole.


Here's a picture of the dough, after it rose for 18 hours: 
I called Pyrex/Corningware about heating the casserole dish in the oven before adding the dough, as a cast iron pot would be used.  They didn't recommend it, but did say it could withstand 450 degrees for baking (just not the broiler).  That meant I would be adding the bread to a room temperature pan before baking.

For the stone baking, it would be similar to the "steam alternative method" discussed by the "Artisan Bread in 5 Minutes a Day" authors.  That's where you trap steam by baking the bread with an inverted foil lasagne pan for the first half of baking.


Following the book's instructions, the batch of dough was put onto a floured baking sheet, and folded into a ball.  I used my bench knife to cut the dough in half and re-fold each half into a ball.  The stone and casserole dish were both sprinkled with cornmeal, the dough was added, and cornmeal was sprinkled on top.


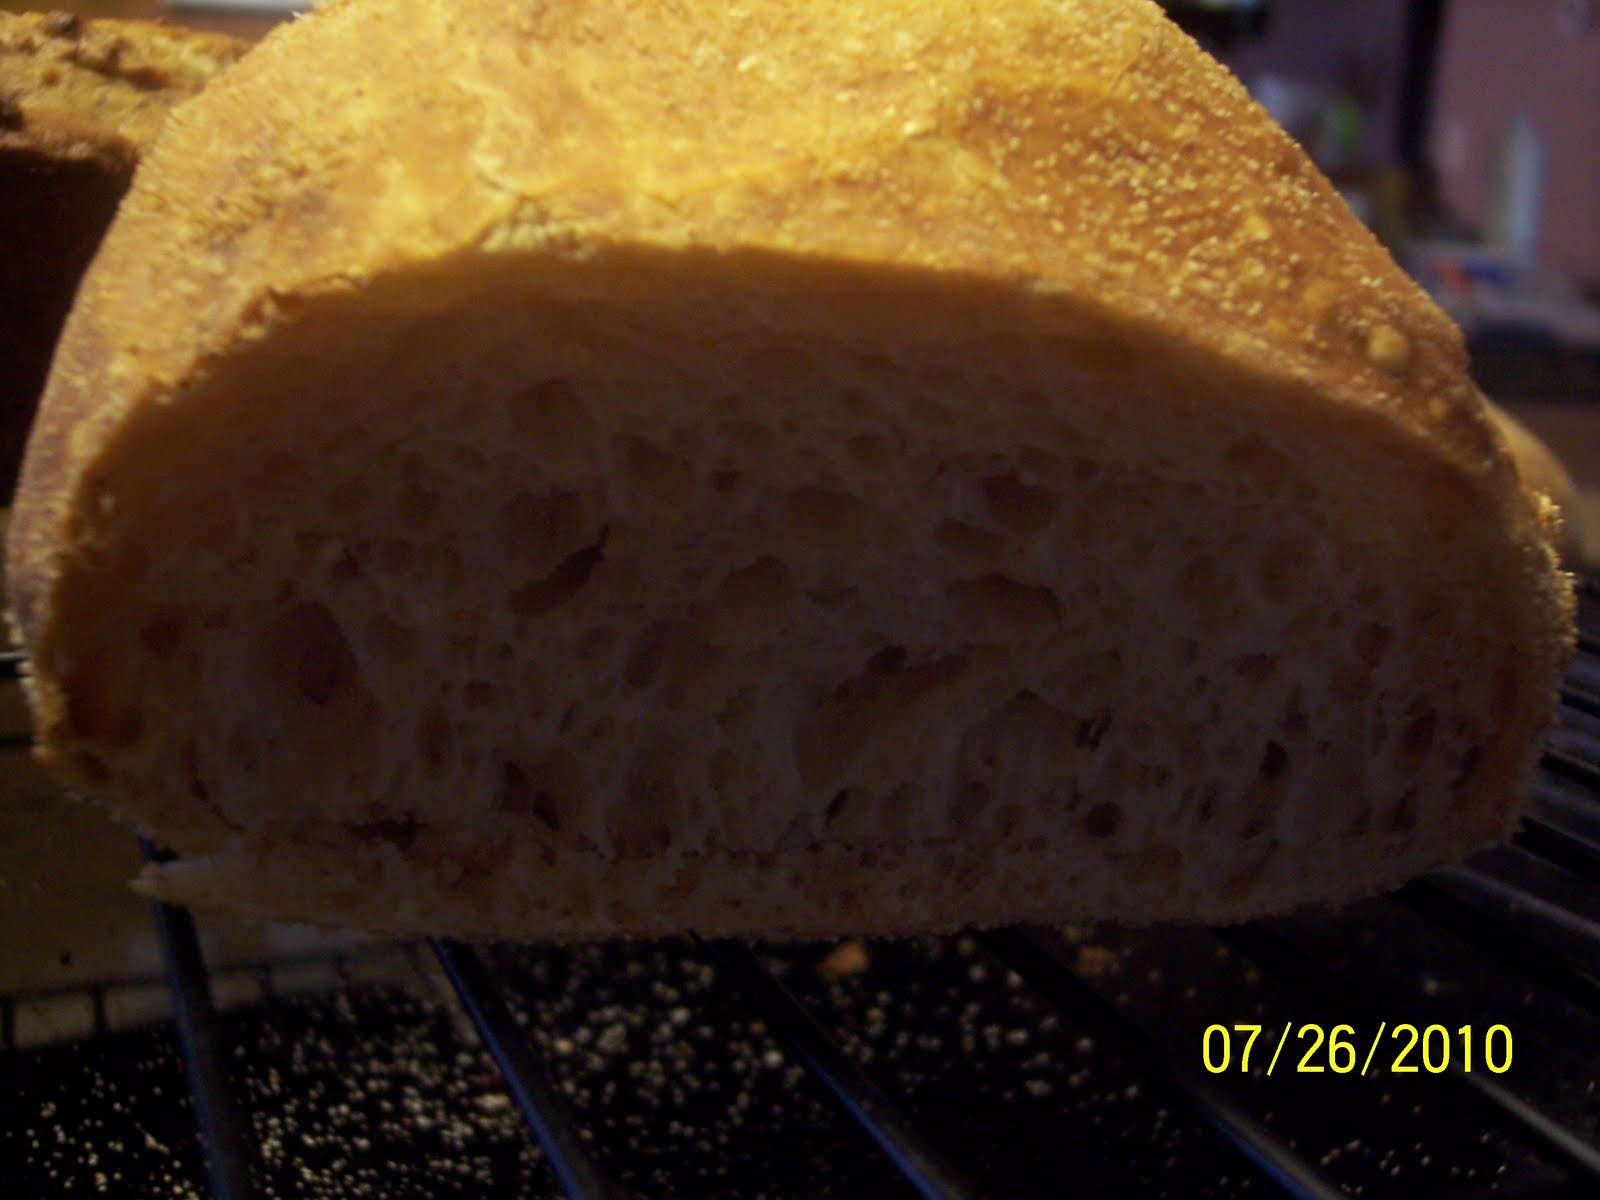
Each bread was baked separately, for this test.  At the end of the baking time for the bread in the casserole dish, the top looked pale.  So I removed the bread and baked it for 5 minutes more to brown it.  When time was up, it registered done with my thermometer: 


Here's a picture of both breads.  The one with the thermometer is the one baked on the stone.  You'll note that it has a slightly darker (and I think better looking) crust.


We tested both breads a few hours later.  Both had a nice crust, although the one on the stone had a crisper crust.  Both had a nice, open crumb:    


And the taste?

My hubby said the bread baked in the covered Corningware tasted
like French bread.  He said the other tasted like "something else." 


I thought the Corningware one tasted kind of flat, and the one on the stone tasted like "extra" flavor.  Actually, the one on the stone tasted like the master dough boule bread from “Artisan Breads in 5 Minutes a Day.”  But you really tasted more true bread flavor from the covered Corningware method.


We were really surprised to find that the breads tasted differently, because they came from the same batch of dough.

I brought both breads to my yoga class for taste tests.  People liked both of them, but one woman made an especially interesting comment.  She said she was sensitive to yeast at one time, and could really taste the yeast on the bread baked on the stone.  She didn’t taste the yeast on the bread baked in the covered Corningware casserole pot.  She suggested that maybe the enclosed method killed more of the yeast, so you didn’t taste it in the baked product.


My husband and I ate the remaining bread, now that it's a day older.  The taste difference showed up even more.


The verdict?  This bread is worth the purchase of another pan  If the taste of the bread is that much better in a Corningware casserole dish, then the crust should be even better in a cast iron dutch oven.  After doing my research on various cast iron pans, I ordered a Tramontina 6.5 Qt. Cast Iron Dutch Oven.  It had high reviews from people using it.  


BUT--I will check out the weight of the dutch oven before I buy it.  I'll have to consider adding a few pounds of dough, too.  It might be too heavy.  Or, I might ask my hubby to put the bread in the oven.

If I don't buy the pot, the recipe is still good in the Corningware casserole dish.


__________
Handwise tips:  If you have hand pain, tendonitis, or arthritis or any other pain issues and want to make this recipe,
  1. This is a very wet dough, and pretty easy to mix.  Many people could probably make the dough.  However, you may need help manuevering the cast iron pot--it's pretty heavy!
  2. Consider making it in a covered casserole dish,  it's still pretty good that way.
  3. Soak your tools in your empty dough bucket or a pan when you are finished using them.   That way, you can wash them easily later (or tomorrow!)  Give yourself the permission of time to clean up much later.
___________

Thanks for coming by my blog.  I hope the test results have been helpful to you.  Please leave a comment before going, and stop by again!